Categories
Instructions

van de kamp’s fish sticks cooking instructions

Van de Kamps Fish Sticks are a beloved choice for quick‚ tasty meals. Their golden-breaded‚ crunchy texture and wild-caught ingredients make them a favorite; This guide provides step-by-step cooking instructions for oven‚ air fryer‚ stovetop‚ and microwave methods to ensure perfectly cooked fish sticks every time.

Follow these detailed directions to achieve crispy‚ flavorful results while maintaining food safety and quality. Whether you prefer oven baking or air frying‚ Van de Kamps Fish Sticks offer convenience and deliciousness for the whole family.

Overview of the Product and Its Popularity

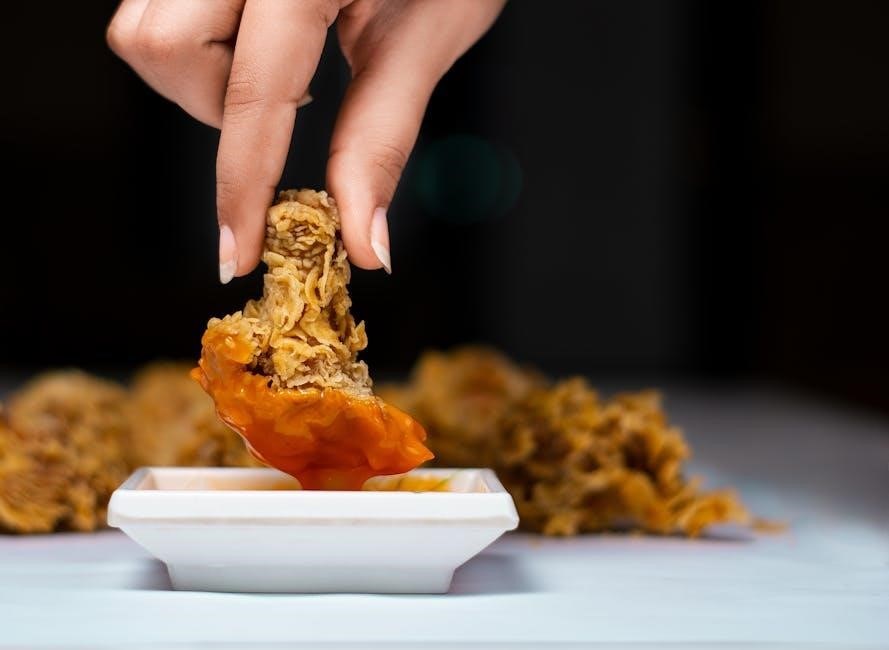
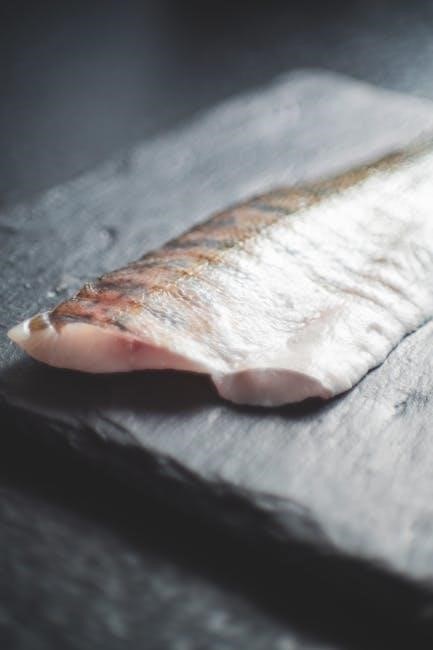
Van de Kamps Fish Sticks are a beloved and convenient seafood option‚ known for their golden-breaded exterior and tender‚ flavorful interior. Made from wild-caught fish‚ they are a popular choice for families and individuals seeking quick‚ delicious meals. Their crunchy texture and savory taste make them a favorite for both kids and adults alike.

The product’s popularity stems from its accessibility and versatility‚ offering a hassle-free solution for mealtime. With pre-portioned sticks‚ they are easy to cook and require minimal preparation. Additionally‚ Van de Kamps Fish Sticks are kosher-certified and sealed in freshness pouches‚ ensuring quality and freshness in every batch.

Rich in protein and low in calories‚ they provide a nutritious option for health-conscious consumers. Their widespread appeal is further enhanced by the variety of cooking methods available‚ including oven‚ air fryer‚ stovetop‚ and microwave. This adaptability makes them a staple in many households‚ catering to diverse preferences and dietary needs.

Whether served as a main dish‚ a snack‚ or part of a larger meal‚ Van de Kamps Fish Sticks consistently deliver a satisfying and flavorful experience‚ making them a timeless favorite in many kitchens worldwide.

Key Features of Van de Kamps Fish Sticks

Wild-caught fish ensures authentic flavor and quality. Kosher certification appeals to diverse dietary preferences. Golden-breaded coating provides a crispy texture‚ while freshness pouches maintain optimal freshness.

High protein content supports health-conscious choices. Convenient cooking options make meal prep easy. These features make Van de Kamps Fish Sticks a versatile and satisfying choice for families and individuals alike.

Ingredients and Nutritional Information

Van de Kamps Fish Sticks are made from wild-caught fish‚ ensuring a natural and authentic flavor. The ingredients include minced fish‚ wheat flour for the breading‚ and vegetable oils for frying. Each serving provides 8 grams of protein‚ making them a great option for health-conscious consumers.

Nutritionally‚ per 3 sticks: 190 calories‚ 1.5g of saturated fat‚ 370mg of sodium‚ and less than 1g of total sugars. These values make Van de Kamps Fish Sticks a balanced choice for family meals. The absence of artificial flavors and preservatives further enhances their appeal to those seeking cleaner ingredients.

The fish sticks are also kosher-certified‚ catering to diverse dietary preferences. With their crispy‚ golden-breaded exterior and tender interior‚ they offer a delicious yet nutritious meal option that suits both children and adults. Sealed in freshness pouches‚ they retain their flavor and texture‚ ensuring quality in every bite.

Why Choose Van de Kamps Fish Sticks?

Van de Kamps Fish Sticks are a top choice for many due to their deliciously crunchy texture and golden-breaded exterior. They are made from wild-caught fish‚ ensuring a fresh and authentic taste. Additionally‚ they are kosher-certified‚ making them suitable for a wide range of dietary preferences.

These fish sticks are convenient and versatile‚ offering an easy meal solution for families. They can be cooked in various ways‚ including oven-baking‚ air frying‚ or stovetop cooking‚ providing flexibility for different preferences. The quick cooking time ensures a fast and stress-free meal preparation‚ perfect for busy households.

With no artificial flavors or preservatives‚ Van de Kamps Fish Sticks are a healthier option compared to many processed foods. Their balanced nutritional profile‚ including 8 grams of protein per serving‚ makes them a great choice for health-conscious consumers. Their affordable price and long shelf life also make them a practical option for stocking up.

Overall‚ Van de Kamps Fish Sticks are a kid-friendly and family-approved meal that combines taste‚ convenience‚ and quality‚ making them a standout product in their category.

Food Safety and Quality Guidelines

For food safety‚ always cook Van de Kamps Fish Sticks to an internal temperature of 165°F. Do not thaw before cooking. Handle carefully after cooking to avoid burns. Ensure proper hygiene during preparation.

Important Safety Precautions Before Cooking

Before cooking Van de Kamps Fish Sticks‚ ensure you follow essential safety guidelines to maintain quality and avoid accidents. Always handle frozen fish sticks with clean hands and utensils to prevent contamination. Never thaw the fish sticks before cooking‚ as this can lead to uneven cooking and potential foodborne illness. When cooking‚ use oven mitts or tongs to handle hot pans and avoid burns. For oven cooking‚ preheat properly and place the sticks on a shallow baking pan in a single layer to ensure even cooking. Avoid overcrowding the pan‚ as this can reduce crispiness and create uneven results. After cooking‚ let the fish sticks cool for a few minutes before serving to prevent burns. Always check that the fish sticks are cooked to an internal temperature of 165°F for food safety. Finally‚ never leave cooking unattended‚ especially when using appliances like the oven or air fryer. By following these precautions‚ you can enjoy a safe and satisfying meal with Van de Kamps Fish Sticks.

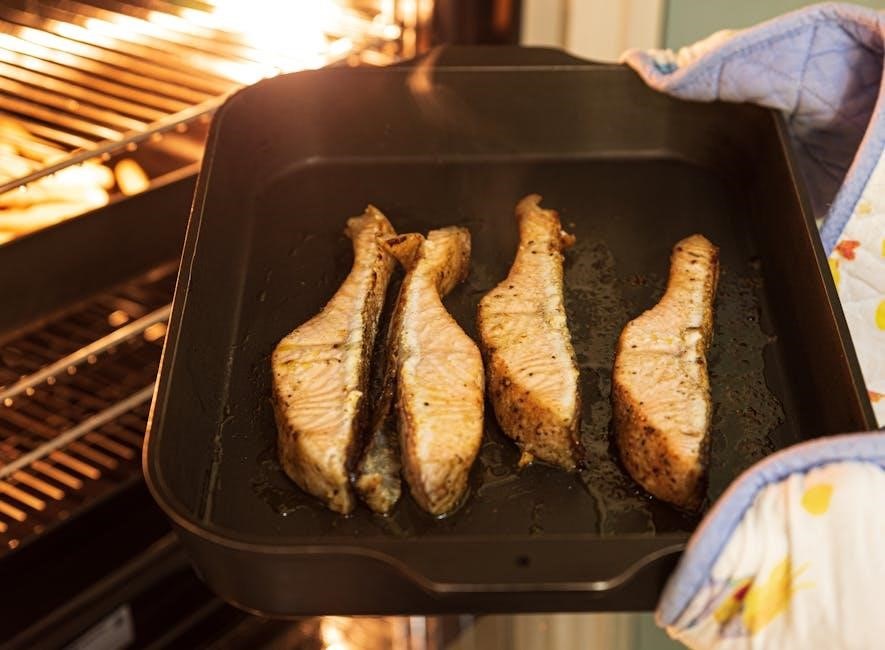
Cooking Van de Kamps Fish Sticks in the Oven

Preheat your oven to 400°F (200°C). Place Van de Kamps Fish Sticks on a greased baking sheet in a single layer. Cook for 15-20 minutes‚ flipping halfway‚ until golden and crispy; Ensure an internal temperature of 165°F for safety. Adjust cooking time as needed for your oven.

Conventional Oven Method: Step-by-Step Instructions

Preheat the Oven: Begin by preheating your oven to 400°F (200°C). Ensure the oven is fully heated before proceeding to cook the fish sticks.

Prepare the Baking Sheet: Lightly grease a baking sheet with cooking spray or a small amount of oil to prevent the fish sticks from sticking.

Arrange the Fish Sticks: Place the frozen Van de Kamps fish sticks on the prepared baking sheet in a single layer‚ ensuring they do not overlap. This promotes even cooking and prevents them from steaming instead of crisping.

Cooking Time: Cook the fish sticks in the preheated oven for 10 to 15 minutes. The exact cooking time may vary depending on your oven’s performance‚ so it’s advisable to check the fish sticks after 10 minutes and adjust the cooking time as needed.

Flip Halfway: After 7 to 8 minutes‚ carefully flip the fish sticks to ensure both sides become golden brown and crispy. Use a spatula to handle them gently to avoid breaking.

Check for Doneness: The fish sticks are done when they are golden brown and crispy. If you’re unsure‚ you can check the internal temperature with a food thermometer; it should reach at least 145°F for food safety.

Cooling and Serving: Once cooked‚ remove the fish sticks from the oven and let them cool on the baking sheet for a minute or two. This helps maintain their crispiness. Serve hot with your favorite dipping sauce or alongside a side dish of your choice.

By following these steps‚ you can achieve perfectly cooked‚ crispy Van de Kamps fish sticks using your conventional oven. Enjoy your meal!

Alternative Oven Temperature Settings for Even Browning

To achieve even browning when cooking Van de Kamps Fish Sticks in the oven‚ consider adjusting the temperature and cooking time. Preheating the oven to 400°F (200°C) is ideal for a balance of crispiness and even cooking. For a crisper texture‚ increase the temperature to 425°F (220°C)‚ but monitor closely to prevent overcooking.

Some ovens may require lowering the temperature to 375°F (190°C) for more even browning‚ especially if the fish sticks tend to brown too quickly. Regardless of the temperature‚ flipping the fish sticks halfway through the cooking time ensures uniform color and texture. For best results‚ bake for 8 to 12 minutes at 400°F‚ turning halfway‚ or adjust the time slightly for higher or lower temperatures.

Using a middle rack position in the oven helps distribute heat evenly‚ preventing hot spots that can cause uneven browning. Additionally‚ lining the baking sheet with parchment paper or lightly spraying it with oil can enhance browning and prevent sticking. Always check the fish sticks for crispiness and golden color before serving.

By experimenting with these temperature settings‚ you can customize the cooking process to achieve perfectly browned and crispy Van de Kamps Fish Sticks every time.

Air Fryer Cooking Instructions

Preheat the air fryer to 400°F (200°C). Place Van de Kamps Fish Sticks in a single layer. Cook for 8-10 minutes‚ shaking halfway‚ until golden brown and crispy. Perfect for a quick‚ crunchy meal.

How to Cook Van de Kamps Fish Sticks in an Air Fryer

Cooking Van de Kamps Fish Sticks in an air fryer is a quick and efficient method that yields crispy results. Start by preheating the air fryer to 400°F (200°C). Remove the fish sticks from the freezer and place them in a single layer in the air fryer basket to ensure even cooking. If necessary‚ lightly spray the basket with cooking oil to prevent sticking.

Cook the fish sticks for 8-10 minutes‚ shaking the basket halfway through the cooking time to promote even browning. Keep an eye on them during the last few minutes‚ as cooking times may vary depending on your air fryer model. The fish sticks are done when they turn golden brown and crispy. Use a fork to check if they’re fully cooked and flake easily.

Once cooked‚ carefully remove the fish sticks from the air fryer and serve hot with your favorite dipping sauce or side dish. For extra crispiness‚ you can pat the fish sticks dry with a paper towel before cooking. Enjoy your perfectly cooked‚ crunchy Van de Kamps Fish Sticks!

Tips for Crispy Results in the Air Fryer

Achieving crispy Van de Kamps Fish Sticks in the air fryer requires attention to detail. First‚ always pat the fish sticks dry with a paper towel before cooking to remove excess moisture‚ which helps the breading crisp up better; Next‚ ensure the air fryer basket is lightly sprayed with cooking oil or non-stick spray to prevent sticking and promote even browning.

Do not overcrowd the basket; cook in batches if necessary‚ to allow air to circulate freely around each fish stick. This prevents steaming and ensures crispiness. Shake the basket halfway through the cooking time to redistribute the fish sticks and cook evenly. For an extra crunch‚ you can increase the air fryer temperature to 420°F (220°C) during the last 2-3 minutes of cooking‚ but monitor closely to avoid burning.

Finally‚ serve the fish sticks immediately after cooking while they’re still hot and crispy. Pair them with your favorite dipping sauce for a delicious and satisfying meal. By following these tips‚ you’ll achieve perfectly crispy Van de Kamps Fish Sticks every time using your air fryer.

Stovetop Cooking Method

Cook Van de Kamps Fish Sticks on the stovetop for a crispy texture. Heat a skillet over medium heat‚ add a small amount of oil‚ and cook the frozen sticks for 3-4 minutes per side until golden brown and heated through.

How to Cook Van de Kamps Fish Sticks on the Stovetop

Cooking Van de Kamps Fish Sticks on the stovetop is a quick and easy method to achieve crispy results. Start by preheating a non-stick skillet or frying pan over medium heat. Lightly coat the pan with a small amount of cooking oil to prevent sticking. Once the pan is hot‚ carefully place the frozen fish sticks in a single layer‚ ensuring they are evenly distributed to allow for proper cooking.

Cook the fish sticks for 3-4 minutes on each side‚ or until they reach a golden brown color and crispy texture. Adjust the heat as needed to avoid burning. It’s important not to overcrowd the pan‚ as this can affect the even cooking of the fish sticks. For best results‚ cook in batches if necessary. After flipping‚ continue cooking until the other side is equally crispy and the sticks are heated through. Using a thermometer‚ ensure the internal temperature reaches 165°F for food safety. Remove the fish sticks from the pan and serve hot with your favorite dipping sauce or side dish. This method provides a delicious and crunchy texture that’s perfect for a quick meal.

Microwave Cooking Instructions

Van de Kamps does not recommend cooking fish sticks in the microwave for optimal quality. However‚ if you choose this method‚ cook on high for 30-45 seconds per side. Ensure the internal temperature reaches 165°F for safety. Not recommended for best results.

How to Cook Van de Kamps Fish Sticks in the Microwave

While Van de Kamps does not recommend microwave preparation for their fish sticks‚ you can still achieve decent results if you follow these steps:

Place a single layer of frozen fish sticks on a microwave-safe plate. Do not overcrowd the plate to ensure even cooking.

Cook on high for 30-45 seconds per side. Adjust the cooking time based on your microwave’s power level.

Carefully flip the fish sticks halfway through the cooking time to ensure even heating.

Check if the fish sticks are crispy and golden brown. If not‚ cook in additional 10-second increments until desired crispiness is achieved.

Allow the fish sticks to stand for 1 minute before serving to ensure internal heat distribution.

Important Note: Microwave cooking may result in uneven browning and a softer texture compared to oven or air fryer methods. For the best taste and texture‚ Van de Kamps recommends using conventional oven or air fryer cooking methods.

Always ensure the fish reaches an internal temperature of 165°F for food safety.

Categories
Instructions

vivosun heat mat instructions

The Vivosun Heat Mat is a reliable, energy-efficient solution for seedlings and reptiles. It provides consistent heat, promoting healthy growth and is designed with safety features for optimal performance.

What is a Vivosun Heat Mat?

A Vivosun Heat Mat is a reliable and efficient heating solution designed to provide consistent warmth for seedlings and reptiles. It raises the rooting area temperature by 10-20°F above ambient air, promoting optimal germination and root growth. The mat emits far-infrared light waves, ensuring gentle and uniform heat distribution. Built with safety features like overheating protection, it is an ideal choice for creating a stable environment for plants and terrariums. Its durable design and easy-to-use interface make it a popular tool for gardeners and reptile enthusiasts alike.

Key Features and Benefits

The Vivosun Heat Mat offers consistent heat output, raising temperatures 10-20°F above ambient levels for optimal seed germination. Its durable, waterproof design ensures long-lasting use, while the built-in overheating protection enhances safety. Easy to install and energy-efficient, it is perfect for seed starting, cutting propagation, and reptile care. The mat works seamlessly with a digital thermostat, allowing precise temperature control. Its compact size and flexible design make it suitable for various applications, providing reliable warmth for healthy plant growth and stable environments for reptiles.

Applications of the Vivosun Heat Mat

The Vivosun Heat Mat is ideal for seed starting, cutting propagation, and reptile care. It provides stable warmth for optimal germination and root development in plants and terrariums.

Seed Starting and Cutting Propagation

The Vivosun Heat Mat is perfect for seed starting and cutting propagation. It raises soil temperature by 10-20°F above ambient, promoting faster germination and healthier root growth. The mat emits consistent heat, ideal for delicate seedlings and cuttings. Placing it under seed trays ensures even warmth distribution, encouraging robust plant development. For best results, pair it with humidity covers to maintain moisture and warmth, creating an optimal environment for seedlings to thrive. This setup is especially beneficial for growers seeking to accelerate the growth cycle of their plants.

Reptile Care and Terrariums

The Vivosun Heat Mat is an excellent heat source for reptile care, providing a stable and warm environment essential for their health. It ensures optimal temperatures for terrariums, promoting the well-being of reptiles. The mat is designed to be placed under the terrarium, offering consistent heat without direct contact with the reptiles. When paired with a digital thermostat, it allows precise temperature control, ensuring a safe and healthy environment. This makes it a reliable choice for reptile enthusiasts seeking to create ideal conditions for their pets. Proper placement and monitoring are key for effective use.

Safety Precautions

Place the Vivosun Heat Mat on a well-drained surface to avoid standing water. Ensure it is plugged into a 120V grounded outlet for safe operation and to prevent hazards.

Placing the Heat Mat on a Well-Drained Surface

Ensure the Vivosun Heat Mat is placed on a surface that drains water effectively, preventing moisture accumulation; This reduces the risk of electrical hazards and maintains efficiency. Avoid placing it directly on cold floors or surfaces with standing water, as this can hinder heat distribution and pose safety risks. Instead, position it on an insulated or dry surface to optimize heat output and ensure safe operation. Proper placement enhances performance while safeguarding against potential dangers.

Avoiding Standing Water

Avoid placing the Vivosun Heat Mat in areas where standing water may accumulate, as this poses a risk of electrical hazards. The mat should not be submerged or exposed to excessive moisture, as it can damage the heating elements and compromise safety. Ensure the surface is dry and well-drained before positioning the mat. Standing water can also reduce the mat’s efficiency by creating a barrier between the heat source and the intended surface. Regularly inspect the area to prevent moisture buildup, ensuring optimal performance and safety.

Installation Steps

Position the mat on a well-drained, insulated surface. Connect to a digital thermostat for precise temperature control. Plug into a grounded outlet for safe operation. Avoid moisture exposure to prevent damage and ensure optimal heating performance; Follow these steps to ensure proper setup and functionality of the Vivosun Heat Mat, promoting efficient heat distribution and maintaining desired temperatures for your plants or reptiles. Always refer to the manual for specific guidelines to avoid any potential hazards. Proper installation ensures longevity and effectiveness of the product.

Positioning the Heat Mat

Place the Vivosun Heat Mat on a well-drained, insulated surface to ensure efficient heat distribution. Avoid exposing it to standing water or direct contact with plants to prevent overheating. Position the mat at least 2-3 inches away from plants or seedlings to maintain even heat spread. For optimal performance, avoid placing the mat on cold floors or surfaces that may absorb heat. Ensure the mat is flat and evenly spread to maximize its heating efficiency. Proper positioning ensures consistent heat delivery and prevents hotspots, promoting healthy growth for seedlings or reptiles. Always follow the manufacturer’s guidelines for placement. Using a humidity cover can enhance heat retention and improve rooting. This setup ensures the mat operates safely and effectively, providing the desired temperature for your plants or pets without risking damage or overheating. Correct positioning also prolongs the lifespan of the heat mat, ensuring reliable performance over time. By carefully positioning the mat, you can achieve the best results for your specific application, whether it’s for seed starting, cutting propagation, or reptile care. Proper installation is key to maximizing the benefits of the Vivosun Heat Mat and ensuring the health of your plants or animals. Always prioritize safety and efficiency when positioning the mat to avoid any potential risks or performance issues. This will help you achieve the optimal environment for growth and well-being. Positioning the mat correctly is the first step toward successful germination, propagation, or maintaining a stable temperature for reptiles. It ensures that heat is distributed evenly and efficiently, creating the ideal conditions for your needs. By following these guidelines, you can make the most out of your Vivosun Heat Mat and enjoy consistent, reliable performance. Remember, proper positioning is essential for both safety and effectiveness. Take the time to ensure your heat mat is placed correctly to achieve the best possible results. This attention to detail will pay off in the long run, ensuring your plants or reptiles thrive in their environment. Always refer to the instructions provided with your Vivosun Heat Mat for specific placement recommendations tailored to your application. This will help you avoid common mistakes and ensure the mat functions as intended. With the right positioning, you can enjoy the full benefits of the Vivosun Heat Mat and achieve your goals, whether you’re starting seeds, propagating cuttings, or caring for reptiles. Proper positioning is the foundation of effective and safe heat mat use. Make sure to get it right to maximize efficiency and safety. This will ensure your Vivosun Heat Mat serves you well for years to come. Positioning the heat mat correctly is a crucial step in achieving optimal results. Take the time to ensure it’s placed properly to enjoy consistent heat delivery and promote healthy growth. By following these guidelines, you can make the most out of your Vivosun Heat Mat and achieve your desired outcomes. Always prioritize correct positioning for safety and efficiency. It makes all the difference in the performance and longevity of your heat mat. Positioning the Vivosun Heat Mat correctly is essential for achieving the best results. Ensure it’s placed on a well-drained, insulated surface, away from standing water and direct contact with plants. This will help maintain even heat distribution and prevent overheating. Proper positioning also ensures the mat operates safely and efficiently, providing the desired temperature for your plants or reptiles. By following these guidelines, you can enjoy consistent, reliable performance from your Vivosun Heat Mat. Correct positioning is key to maximizing its benefits and ensuring the health of your plants or animals. Take the time to position the mat properly to achieve the optimal environment for growth and well-being. This attention to detail will ensure your Vivosun Heat Mat functions as intended and provides the best possible results. Positioning the mat correctly is the first step toward successful germination, propagation, or maintaining a stable temperature for reptiles. It ensures that heat is distributed evenly and efficiently, creating the ideal conditions for your needs. By following these guidelines, you can make the most out of your Vivosun Heat Mat and enjoy consistent, reliable performance. Remember, proper positioning is essential for both safety and effectiveness; Take the time to ensure your heat mat is placed correctly to achieve the best possible results. This attention to detail will pay off in the long run, ensuring your plants or reptiles thrive in their environment. Always refer to the instructions provided with your Vivosun Heat Mat for specific placement recommendations tailored to your application. This will help you avoid common mistakes and ensure the mat functions as intended. With the right positioning, you can enjoy the full benefits of the Vivosun Heat Mat and achieve your goals, whether you’re starting seeds, propagating cuttings, or caring for reptiles. Proper positioning is the foundation of effective and safe heat mat use. Make sure to get it right to maximize efficiency and safety. This will ensure your Vivosun Heat Mat serves you well for years to come. Positioning the heat mat correctly is a crucial step in achieving optimal results. Take the time to ensure it’s placed properly to enjoy consistent heat delivery and promote healthy growth. By following these guidelines, you can make the most out of your Vivosun Heat Mat and achieve your desired outcomes. Always prioritize correct positioning for safety and efficiency. It makes all the difference in the performance and longevity of your heat mat.

Using a Digital Thermostat

For precise temperature control, use the Vivosun Digital Thermostat with the heat mat. Press the “SET” button to display the current target temperature. Hold “SET” for 3 seconds to enter temperature-setting mode. Adjust the temperature using the “+” or “-” buttons. The thermostat will maintain the set temperature, ensuring optimal conditions for seedlings or reptiles. Monitor the temperature regularly to avoid overheating. The thermostat also features automatic overheating protection, turning off the mat if it exceeds safe levels. Always plug the mat into a grounded 120V outlet for safe operation. Regular monitoring ensures consistent heat delivery and prevents temperature fluctuations. This setup provides accurate and reliable temperature management, essential for healthy growth and well-being. By using the digital thermostat, you can customize and maintain the ideal environment for your plants or pets with ease. Proper use of the thermostat enhances the performance of the heat mat, ensuring it operates efficiently and safely. Always follow the manufacturer’s guidelines for thermostat usage to achieve the best results. This combination of the heat mat and digital thermostat offers a user-friendly solution for maintaining precise temperatures, making it ideal for both seed starting and reptile care. The thermostat’s intuitive design allows for easy adjustments, ensuring your environment stays consistent and optimal. With the Vivosun Digital Thermostat, you can trust your heat mat to deliver the right amount of heat, every time. This advanced temperature control system is designed to meet the specific needs of your plants or reptiles, providing peace of mind and reliable performance. By leveraging the thermostat’s features, you can create a stable and nurturing environment that promotes healthy growth and thriving results. The digital thermostat is an essential tool for maximizing the effectiveness of the Vivosun Heat Mat, ensuring precise temperature control and safe operation. Use it to maintain optimal conditions and achieve the best possible outcomes for your plants or pets. The thermostat’s accuracy and ease of use make it an indispensable component of your setup, allowing you to focus on growth and care with confidence. With the Vivosun Digital Thermostat, temperature management becomes effortless and efficient, ensuring your heat mat performs at its best. This innovative solution simplifies temperature control, making it easier than ever to provide the ideal environment for your needs. By combining the heat mat with the digital thermostat, you create a powerful system that delivers consistent heat and promotes healthy development. The thermostat’s advanced features and user-friendly interface make it a valuable asset for anyone using the Vivosun Heat Mat. Trust the digital thermostat to maintain the perfect temperature, giving you peace of mind and exceptional results. This combination is designed to enhance your experience, ensuring safety, efficiency, and effectiveness. With the Vivosun Digital Thermostat, you can achieve precise temperature control, making it easier to care for your plants or reptiles. The thermostat’s reliability and accuracy ensure that your heat mat operates at its best, providing consistent heat and promoting optimal growth. By following the instructions and using the thermostat correctly, you can enjoy the full benefits of the Vivosun Heat Mat and achieve your goals with confidence. The digital thermostat is a crucial component that elevates the performance of the heat mat, offering advanced temperature management and ease of use. With this system, you can maintain the ideal environment for your plants or reptiles, ensuring their health and well-being. The thermostat’s intuitive design and precise control make it an essential tool for anyone seeking reliable and efficient temperature management. By utilizing the Vivosun Digital Thermostat, you can optimize the performance of your heat mat and create a stable, nurturing environment that supports growth and thrives. This advanced system is designed to meet your specific needs, providing accurate and consistent temperature control. With the Vivosun Digital Thermostat, you can trust your heat mat to deliver the right amount of heat, every time, ensuring the best possible results for your plants or pets. The thermostat’s ease of use and reliability make it a valuable addition to your setup, allowing you to focus on what matters most – the health and growth of your plants or reptiles. By following the instructions and using the thermostat correctly, you can enjoy the full benefits of the Vivosun Heat Mat and achieve your goals with confidence. The digital thermostat is a powerful tool that enhances the performance of the heat mat, offering precise temperature control and ease of use. With this system, you can maintain the ideal environment for your plants or reptiles, ensuring their health and well-being. The thermostat’s intuitive design and precise control make it an essential tool for anyone seeking reliable and efficient temperature management. By utilizing the Vivosun Digital Thermostat, you can optimize the performance of your heat mat and create a stable, nurturing environment that supports growth and thrives. This advanced system is designed to meet your specific needs, providing accurate and consistent temperature control. With the Vivosun Digital Thermostat, you can trust your heat mat to deliver the right amount of heat, every time, ensuring the best possible results for your plants or pets. The thermostat’s ease of use and reliability make it a valuable addition to your setup, allowing you to focus on what matters most – the health and growth of your plants or reptiles. By following the instructions and using the thermostat correctly, you can enjoy the full benefits of the Vivosun Heat Mat and achieve your goals with confidence. The digital thermostat is a powerful tool that enhances the performance of the heat mat, offering precise temperature control and ease of use. With this system, you can maintain the ideal environment for your plants or reptiles, ensuring their health and well-being. The thermostat’s intuitive design and precise control make it an essential tool for anyone seeking reliable and efficient temperature management. By utilizing the Vivosun Digital Thermostat, you can optimize the performance of your heat mat and create a stable, nurturing environment that supports growth and thrives. This advanced system is designed to meet your specific needs, providing accurate and consistent temperature control. With the Vivosun Digital Thermostat, you can trust your heat mat to deliver the right amount of heat, every time, ensuring the best possible results for your plants or pets. The thermostat’s ease of use and reliability make it a valuable addition to your setup, allowing you to focus on what matters most – the health and growth of your plants or reptiles. By following the instructions and using the thermostat correctly, you can enjoy the full benefits of the Vivosun Heat Mat and achieve your goals with confidence.

Placing the Mat on an Insulated Surface

For optimal performance, place the Vivosun Heat Mat on an insulated surface to minimize heat loss and maintain consistent temperatures. Avoid positioning it directly on cold floors, as this can reduce efficiency. Covering the mat with a humidity cover or dome helps retain warmth and maintain humidity, promoting better rooting and growth. Ensure the surface is well-drained and free from standing water to prevent damage and ensure safe operation. Proper placement on an insulated surface enhances heat efficiency and provides a stable environment for seedlings or reptiles. This setup ensures the mat delivers consistent heat, promoting healthy growth and development.

Operating the Digital Thermostat

Press the ‘SET’ button to view the target temperature, then use ‘+’ or ‘-‘ to adjust. The probe monitors conditions, ensuring accurate and stable heat delivery.

Setting the Target Temperature

To set the target temperature, press the “SET” button on the thermostat once. The current target temperature will be displayed on the screen. Hold the “SET” button for 3 seconds to enter the temperature setting mode. Use the “+” or “-” buttons to adjust the temperature to your desired level. The thermostat will save the setting automatically. Ensure the probe is placed correctly in the substrate to monitor conditions accurately. This ensures the Vivosun Heat Mat delivers consistent and stable heat, promoting optimal growth and health for your plants or reptiles.

Adjusting the Temperature

Adjusting the temperature on the Vivosun Heat Mat is straightforward. Use the “+” or “-” buttons on the thermostat to increase or decrease the target temperature. The digital display will show the updated setting. The thermostat will continuously monitor and adjust the heat output to maintain the desired temperature. For precise control, ensure the probe is securely placed in the substrate or area being heated. Regularly check the temperature to ensure it aligns with the needs of your plants or reptiles. This feature ensures consistent and stable heat, promoting healthy growth and comfort.

Monitoring the Temperature

Monitoring the temperature is crucial for optimal performance. Check the digital thermostat display frequently to ensure the set temperature matches the current reading. The probe should be placed in the substrate or area being heated to provide accurate measurements. Regular monitoring prevents overheating or underheating, which can harm plants or reptiles. By maintaining consistent heat, you ensure healthy growth and comfort. This feature allows you to make adjustments as needed, keeping your environment stable and safe.

Maintenance and Care

Regularly clean the heat mat with a damp cloth, ensuring no moisture seeps inside. Store it in a dry, cool place when not in use to maintain efficiency and longevity.

Cleaning the Heat Mat

To clean the Vivosun Heat Mat, unplug it and allow it to cool completely. Use a soft, damp cloth to wipe away any dirt or debris. Avoid harsh chemicals or abrasive cleaners, as they may damage the mat. For tougher stains, mix a small amount of mild soap with water and gently scrub the area. Rinse thoroughly with a clean, damp cloth to remove any soap residue. Ensure the mat is dry before storing or reuse to prevent moisture buildup and maintain its efficiency.

Storing the Heat Mat

When not in use, store the Vivosun Heat Mat in a cool, dry place to maintain its performance. Ensure it is completely dry before storage to prevent mold or mildew. Roll or fold the mat carefully to avoid creases or damage. Place it in a protective cover or box to shield it from dust and physical stress. Avoid storing it near direct sunlight or high-temperature areas, as this could degrade the material. Proper storage ensures the mat remains functional and ready for future use, whether for seedlings or reptile care.

Troubleshooting Common Issues

Check for uneven heating by ensuring the mat is flat and evenly distributed. If the thermostat malfunctions, reset it or check the power supply. Verify connections if the mat fails to heat.

Uneven Heating

Uneven heating can occur if the mat is bunched or folded. Ensure the mat lies flat on a solid surface. Avoid placing it on uneven or soft surfaces. Check for air bubbles or creases, as these can disrupt heat distribution. For optimal performance, position the mat on an insulated surface away from drafts. If issues persist, consider using a thermostat to regulate temperature more precisely. Regularly inspect the mat for damage or wear that might affect heating uniformity.

Thermostat Malfunction

A thermostat malfunction can cause inconsistent heating. If the thermostat fails to maintain the set temperature, first unplug and restart the device. Ensure the probe is placed correctly in the substrate. Check for loose connections or damage to the thermostat or sensor. If issues persist, reset the thermostat by pressing and holding the “SET” button for 5 seconds. In severe cases, replace the thermostat to ensure proper temperature regulation. Always refer to the user manual for specific reset instructions or contact customer support for further assistance.

Optimizing Performance

Use humidity covers to retain heat and place the mat on insulated surfaces for better efficiency and consistent temperature control.

Using Humidity Covers

Humidity covers are essential for maximizing the effectiveness of the Vivosun Heat Mat. By trapping moisture and heat, they create an ideal environment for seedlings and cuttings. This ensures consistent root zone temperatures, promoting healthy germination and robust root development. The cover also helps maintain humidity levels, which is critical for optimal growth. Simply place the cover over the plant tray after positioning the heat mat, ensuring a snug fit to prevent heat and moisture loss. This setup enhances overall growth performance and supports successful propagation.

Placing the Mat on Different Surfaces

Place the Vivosun Heat Mat on a well-drained surface to avoid standing water, ensuring proper function. For optimal heating, position it on an insulated surface rather than a cold floor, as this reduces heat loss. Avoid placing the mat directly on substrate, as it primarily heats the surface it is attached to. Covering the mat with a humidity cover or dome enhances heat retention and maintains consistent root zone temperatures, improving germination and growth. This setup ensures efficient heating and promotes healthy plant development.

The Vivosun Heat Mat is a reliable and efficient tool for seedlings and reptiles, offering consistent heat and safety features for optimal growth and care.

The Vivosun Heat Mat is a versatile and efficient heating solution for seedlings and reptiles, designed to raise temperatures 10-20°F above ambient levels. It ensures optimal germination and root growth while providing a stable heat source for terrariums. Safety features include overheating protection and a waterproof design. Proper placement on a well-drained, insulated surface and using a digital thermostat are crucial for performance. Regular maintenance, such as cleaning and storing correctly, extends its lifespan. By following instructions, users can maximize its benefits for plant and reptile care, ensuring consistent and reliable heat distribution.

Final Thoughts on Using the Vivosun Heat Mat

The Vivosun Heat Mat is an excellent investment for gardeners and reptile enthusiasts, offering consistent heat for optimal growth and well-being. Its ease of use, paired with essential safety features, makes it a reliable choice. By adhering to the instructions and maintaining proper care, users can enjoy long-term benefits. Whether for seedlings or terrariums, this mat delivers efficient performance, making it a valuable tool for achieving successful plant propagation and ensuring the health of reptiles. It’s a must-have for anyone seeking precise temperature control and durability in their heating solutions.

Categories
Instructions

flat plus vape pen instructions

The Flat Plus Vape Pen is a high-performance, user-friendly device designed for seamless vaping experiences․ With its 900mAh battery, Type-C charging, and adjustable voltage settings, it offers versatility for both beginners and experienced users․ The pen features a sleek design, compatibility with 510 cartridges, and advanced functions like preheat and session modes, ensuring a customizable and efficient vaping session․

1․1 Overview of the Flat Plus Vape Pen

The Flat Plus Vape Pen is a high-performance, portable device designed for seamless vaping experiences․ It features a powerful 900mAh battery with Type-C charging for quick and convenient power-ups․ The pen offers adjustable voltage settings, allowing users to customize their experience with three distinct levels: 2․6V, 3․2V, and 3․8V․ Additionally, it includes a preheat function and session mode for enhanced control over vaping sessions․ Compatible with 510-thread cartridges, the Flat Plus is versatile and easy to use, making it ideal for both beginners and experienced vapers․ Its compact design and user-friendly interface ensure reliability and flexibility, while its durability and advanced features provide a satisfying vaping experience․

1․2 Key Features of the Flat Plus Vape Pen

The Flat Plus Vape Pen stands out with its 900mAh rechargeable battery, ensuring extended sessions and quick charging via Type-C․ It offers three adjustable voltage levels—2․6V, 3․2V, and 3․8V—allowing users to tailor their vaping experience․ The device includes a preheat function, activated by pressing the power button twice, and session mode, which enables continuous vaping without holding the button․ Its 510-thread compatibility makes it versatile for various cartridges․ Designed with a sleek, compact build, the Flat Plus is both durable and portable․ Safety features like a 15-second cutoff and indicator lights enhance user experience; These features combine to provide a reliable, customizable, and efficient vaping solution for all users․

1․3 Importance of Proper Usage

Proper usage of the Flat Plus Vape Pen is essential for ensuring safe, efficient, and enjoyable vaping sessions․ Always follow the manufacturer’s guidelines to maintain device performance and longevity․ Avoid overcharging, as this can damage the battery, and use the correct Type-C charger provided․ Properly attach the cartridge to prevent leaks or connectivity issues․ Understanding and utilizing the preheat and voltage settings correctly can enhance vapor quality and flavor․ Regular cleaning and maintenance are crucial to prevent clogging and ensure optimal functionality․ Misuse can lead to reduced battery life or device malfunction․ Adhering to proper usage practices ensures a satisfying and reliable vaping experience while maintaining safety standards․

1․4 Legal and Safety Considerations

Before using the Flat Plus Vape Pen, ensure compliance with local laws and regulations regarding vaping products․ This device is intended for legal-aged adults only, as specified by regional vaping laws․ Always prioritize safety by following proper usage and charging guidelines․ Avoid using damaged batteries or unauthorized chargers, as this can lead to malfunctions or hazards․ Keep the device out of reach of children and pets to prevent accidental ingestion of components․ Yocan, the manufacturer, adheres to strict quality standards, but user responsibility is key to safe operation․ Proper maintenance and adherence to safety protocols will help prevent accidents and ensure a secure vaping experience․

Unboxing and Initial Setup

The Flat Plus Vape Pen includes a rechargeable battery and user manual․ Initial setup involves charging the battery and attaching a 510-thread cartridge․

2․1 What’s Included in the Box

The Flat Plus Vape Pen box typically includes a rechargeable vape pen battery, a user manual, and compatibility with 510-thread cartridges․ Note that a USB-C charging cable may not be included․

2․2 Understanding the Device Components

The Flat Plus Vape Pen consists of a rechargeable battery, a power button, and a cartridge attachment area․ The battery is the core component, providing power for vaping sessions․ The power button controls the device’s functions, such as turning it on/off and adjusting settings․ The cartridge area is designed for 510-thread cartridges, ensuring compatibility with a wide range of options․

The mouthpiece is where you inhale the vapor, and the charging port allows for convenient recharging via Type-C USB․ These components work together to deliver a smooth and customizable vaping experience, making the Flat Plus user-friendly for both newcomers and experienced users․

2․3 Charging the Battery for the First Time

Before using the Flat Plus Vape Pen, charge the battery fully using the provided Type-C charging cable․ Connect the pen to a compatible USB charger and ensure the device is turned off during charging․ The battery, with capacities ranging from 350mAh to 900mAh, typically comes partially charged but requires a full cycle for optimal performance․

A white light will flash during charging, and the indicator will turn off once fully charged․ Avoid overcharging, as this can affect battery longevity․ Allow 1-2 hours for a complete charge to ensure the pen is ready for extended vaping sessions․ Always use the recommended charger to maintain safety and device health․

2․4 Attaching the Cartridge

To attach the cartridge to the Flat Plus Vape Pen, locate the 510-thread connection on the battery․ Screw the cartridge into the connection clockwise until it is securely fastened․ Ensure the cartridge is aligned properly to avoid cross-threading․ Do not over-tighten, as this may damage the threads․ Once attached, press the power button to test the connection and ensure proper function․ Properly securing the cartridge ensures efficient vapor production and prevents leaks․ Always use compatible 510-thread cartridges for optimal performance and safety․ After attachment, your Flat Plus Vape Pen is ready for use, offering a seamless and enjoyable vaping experience․

Operating the Flat Plus Vape Pen

The Flat Plus Vape Pen operates with a 5-click on/off function․ Adjust voltage by pressing the button 3 times, preheat with 2 clicks, and hold to vape․ Designed for efficient and customizable sessions, it offers a user-friendly experience with multiple features for optimal performance․

3․1 Turning the Device On/Off

To turn the Flat Plus Vape Pen on or off, press the power button five times in a row․ The device will confirm with five white flashes when activated and the same when deactivated․ This feature prevents accidental operation, ensuring safety and battery conservation․ Always turn off the pen when not in use to maintain optimal performance․

3․2 Adjusting the Voltage Levels

The Flat Plus Vape Pen allows users to adjust voltage levels for a personalized vaping experience․ With three preset settings—2․6V, 3․2V, and 3․8V—users can customize their sessions based on cartridge type and preference․ To switch between levels, press the power button three times quickly․ The device will indicate the selected voltage with a color-coded LED: red for 2․6V, blue for 3․2V, and green for 3․8V․ This feature ensures optimal performance and flavor extraction, catering to both light and heavy users․ Adjusting voltage is straightforward, making it easy for anyone to tailor their experience to their liking․

3․3 Using the Preheat Function

The Flat Plus Vape Pen features a convenient preheat function to ensure consistent vapor production and flavor․ To activate preheat, press the power button twice while the device is on․ This initiates a 10-second preheating cycle, indicated by a flashing LED light․ During this time, the pen gently heats the cartridge to prepare for use․ Once preheating is complete, the LED will stop flashing, and you can begin vaping․ This function is especially useful for thicker oils or colder environments, ensuring a smooth draw every time․ It’s a simple yet effective feature that enhances your vaping experience without requiring complex settings․

3․4 Switching Between Voltage Settings

To switch between voltage settings on the Flat Plus Vape Pen, press the power button three times quickly while the device is on․ The LED light will indicate the current voltage level: red for 2․6V, blue for 3․2V, and green for 3․8V․ This feature allows you to customize your vaping experience based on your preference for vapor production and flavor intensity․ The device will remember your last used voltage setting, ensuring a seamless experience․ Adjusting the voltage is simple and intuitive, making it easy to tailor your sessions to suit your needs․ Always start with a lower setting and increase as needed to find your ideal vaping experience․

Advanced Features of the Flat Plus

The Flat Plus offers advanced features like Session Mode, On-Demand Mode, and customizable voltage settings, enhancing your vaping experience with convenience and precision․

4․1 Session Mode

Session Mode on the Flat Plus allows for continuous vaping without needing to press the power button during use․ To activate this mode, press the power button twice․ The device will indicate the mode is active with a color-coded light․ Once enabled, you can vape effortlessly without manual button presses, making it ideal for extended sessions․ The mode automatically deactivates after a set period, ensuring safety and battery efficiency․ This feature is particularly useful for those seeking a hassle-free vaping experience, combining convenience with the Flat Plus’s advanced functionality․ The intuitive design makes it easy to switch between modes, catering to both casual and frequent users․

4․2 On-Demand Mode

On-Demand Mode on the Flat Plus Vape Pen allows users to vape instantly by pressing and holding the power button․ This mode is ideal for those who prefer control over their sessions․ When activated, the device produces vapor only when the button is pressed, offering a more precise and customizable experience․ The mode is easy to use and complements the device’s portability and efficiency․ It ensures minimal waste and maximizes vapor quality, making it a popular choice for both casual and frequent users․ The Flat Plus’s On-Demand Mode enhances the overall vaping experience, providing a seamless and intuitive way to enjoy your sessions․

4․3 Safety Features

The Flat Plus Vape Pen is equipped with multiple safety features to ensure a secure and reliable vaping experience; It includes a 15-second safety cutoff to prevent overheating and protect the device from excessive use․ Additional safety measures include overcharge protection and short-circuit prevention, safeguarding both the battery and the user․ The pen also features secure cartridge connection technology to avoid leaks or poor performance․ These safety features are designed to provide peace of mind while maintaining the device’s performance and efficiency․ By incorporating these protections, the Flat Plus Vape Pen prioritizes user safety without compromising on its advanced functionality and versatility․

4․4 Customizing Your Vaping Experience

The Flat Plus Vape Pen offers extensive customization options to tailor your vaping experience to your preferences․ With three adjustable voltage levels (2․6V, 3․2V, and 3․8V), you can fine-tune your sessions for optimal flavor and vapor production․ Switching between voltage settings is quick and easy—simply press the power button three times․ Additionally, the preheat function ensures consistent results by preparing your cartridge before use, activated by pressing the button twice․ The device also supports both session mode and on-demand mode, giving you control over when and how you vape․ These features allow you to personalize your experience, making the Flat Plus a versatile choice for all users․

Maintenance and Care

Regularly clean the device with a cotton swab and isopropyl alcohol, store it in a protective case, inspect the charging cable, and check for cartridge leaks․

5․1 Cleaning the Vape Pen

Cleaning the Flat Plus Vape Pen is essential for maintaining performance and hygiene․ Start by disassembling the device, separating the battery from the cartridge․ Use a cotton swab lightly soaked in isopropyl alcohol to wipe down the battery contacts and the exterior of the cartridge․ Avoid submerging any components in liquid․ For stubborn residue, let the swab sit on the area for a few moments before wiping clean․ Once cleaned, allow all parts to air dry completely before reassembling and using the device․ Regular cleaning prevents residue buildup and ensures optimal vapor production․

5․2 Replacing the Cartridge

To replace the cartridge on your Flat Plus Vape Pen, start by turning off the device․ Hold the pen securely and locate the cartridge attached to the battery․ Unscrew the cartridge counterclockwise until it detaches completely․ Dispose of the used cartridge responsibly․ Take the new 510-thread cartridge and screw it onto the battery clockwise until snug․ Avoid over-tightening to prevent damage․ Once securely attached, turn the device on and test it to ensure proper functionality․ Regular cartridge replacement ensures optimal performance and flavor quality․

5․3 Updating Firmware (If Applicable)

Firmware updates for the Flat Plus Vape Pen are rare, as it is designed with fixed settings․ However, if updates are available, ensure the device is fully charged․ Use a compatible computer or smartphone with the manufacturer’s software․ Connect the pen via USB and follow the on-screen instructions to download and install the update․ Avoid interrupting the process to prevent damage․ Once complete, disconnect and test the device to ensure proper functionality․ Always refer to the manufacturer’s guidelines for specific instructions, as improper updates can void the warranty or harm the device․

5․4 Storing the Device Properly

Proper storage of the Flat Plus Vape Pen is essential to maintain its performance and longevity․ Store the device in a cool, dry place, away from direct sunlight and extreme temperatures․ Use a protective case to prevent scratches and damage․ Keep the pen upright to avoid leaks, especially if a cartridge is attached․ Clean the device thoroughly before storing it for extended periods․ Ensure the battery is partially charged (not fully depleted) to prevent damage․ Avoid storing it near flammable materials or in humid environments․ Always keep it out of reach of children and pets․ Proper storage ensures the device remains functional and ready for use when needed․

Troubleshooting Common Issues

Troubleshooting common issues with the Flat Plus Vape Pen ensures optimal performance and extends its lifespan․ Check connections, charge the battery, and consult the manual for solutions to problems like low vapor production or device malfunction․ Contact customer support if issues persist․

6․1 Device Not Turning On

If the Flat Plus Vape Pen does not turn on, ensure the battery is fully charged using the Type-C charger․ Check for loose cartridge connections and clean the threads․ Press the power button five times to activate the device․ If it still doesn’t turn on, inspect for blockages in the airway or a faulty power button․ Verify that the cartridge is properly attached and that no debris obstructs the connection․ If issues persist, contact customer support for assistance․ Always refer to the user manual for detailed troubleshooting steps to resolve the issue effectively and maintain device functionality․

6․2 Low Vapor Production

Low vapor production with the Flat Plus Vape Pen can often be resolved by adjusting a few key settings․ First, ensure the cartridge is securely attached to maintain proper airflow and connection․ Check the voltage level and adjust it to a higher setting if necessary, as lower voltages may result in weaker vapor․ Clean the airway and cartridge connection to remove any blockages․ Additionally, ensure the cartridge is not empty or damaged, as this can significantly reduce vapor output․ If issues persist, try switching to a different cartridge or consulting the user manual for further troubleshooting steps to optimize your vaping experience․

6․3 Cartridge Not Connecting Properly

If the cartridge is not connecting properly to the Flat Plus Vape Pen, ensure the 510-thread connection is clean and free from debris․ Use a cotton swab lightly dampened with isopropyl alcohol to clean the threading on both the cartridge and the battery․ Verify that the cartridge is screwed on firmly but not over-tightened, as this could damage the connection․ Check for any visible damage to the threading or contacts․ If the issue persists, try using a different cartridge to rule out cartridge-specific problems; Proper alignment and a secure connection are essential for optimal performance and vapor production․ Regular maintenance can help prevent connectivity issues over time․

6․4 Battery Life Issues

If you experience issues with the battery life of your Flat Plus Vape Pen, ensure it is charged correctly using the provided Type-C charger․ Avoid overcharging, as this can degrade the battery over time․ If the battery drains quickly, check your voltage settings, as higher voltage levels consume power faster․ Frequent use of the preheat function or extended sessions can also reduce battery life․ To conserve power, turn off the device when not in use by pressing the power button five times․ Store the pen properly in a cool, dry place to maintain battery health․ If issues persist, consider replacing the battery or consulting the manufacturer for assistance․

Safety Guidelines

Always follow safety guidelines when using the Flat Plus Vape Pen․ Ensure proper battery care, avoid overheating, and use original charging cables․ Store the device safely and keep it out of reach of children․ Regularly inspect the cartridge and battery for damage to prevent malfunctions; Adhere to local laws and regulations regarding vaping products․ Proper usage and maintenance are crucial for a safe and enjoyable experience․

7․1 Battery Safety Tips

Ensure the Flat Plus Vape Pen battery is used safely to prevent damage or hazards․ Always charge the device with the original Type-C charger to avoid overcharging․ Avoid using damaged cables or adapters, as they can cause electrical issues․ Do not exceed the recommended charging time, as overcharging can degrade battery health․ Store the battery in a cool, dry place away from metal objects to prevent accidental activation․ Regularly inspect the battery for signs of damage, such as swelling or dents, and replace it if necessary․ Never use a damaged battery, as it can pose serious safety risks․ Keep the device away from extreme temperatures to maintain optimal performance and safety․

7․2 Preventing Overheating

To prevent overheating, ensure the Flat Plus Vape Pen is used correctly․ Avoid prolonged activation of the power button, as extended use can cause the device to heat up․ Use the preheat function responsibly, as excessive preheating may lead to higher temperatures․ Keep the device away from direct sunlight or high-temperature environments․ Regularly clean the cartridge and battery connection to ensure proper airflow and conductivity․ Never leave the pen in a closed vehicle or hot surface․ If the device feels unusually warm, discontinue use and allow it to cool down․ Proper storage and usage habits will help maintain optimal performance and safety․

7․3 Safe Charging Practices

Always use the included Type-C charging cable and a compatible adapter to charge your Flat Plus Vape Pen․ Avoid using damaged cables or adapters, as they may cause malfunctions or safety hazards․ Charge the device on a flat, stable surface away from flammable materials․ Do not overcharge the battery; once the LED indicator turns off, the pen is fully charged․ Avoid charging the device in extreme temperatures or while it is in use․ Never leave the pen unattended during charging․ Keep the charging area away from liquids and moisture to prevent electrical accidents․ Proper charging habits will extend the battery’s lifespan and ensure safe operation․

7․4 Avoiding Leaks and Spills

To prevent leaks and spills with your Flat Plus Vape Pen, ensure the cartridge is securely attached to the battery using the 510 thread connection; Avoid over-tightening, as this may damage the threads․ Store the device upright to prevent oil from leaking out of the cartridge․ Regularly inspect the cartridge and battery for any signs of wear or damage․ Use only high-quality, authentic cartridges designed for the Flat Plus to ensure a proper seal․ Handle the pen with care to avoid dropping it, as impacts can cause internal damage․ If a spill occurs, clean it immediately with a soft cloth to prevent residue buildup and maintain optimal performance․

Accessories and Upgrades

The Flat Plus Vape Pen offers various accessories to enhance your experience, including compatible chargers, cartridges, protective cases, and additional batteries for convenience and safety․ These upgrades ensure optimal performance and device protection, catering to both style and functionality․

8․1 Compatible Chargers

The Flat Plus Vape Pen is equipped with Type-C charging for fast and efficient battery replenishment․ The device is compatible with standard USB-C chargers, ensuring easy access to power․ While the pen does not include a charging cable, users can utilize any certified USB-C cable for safe and reliable charging․ For optimal performance, it’s recommended to use high-quality chargers that meet safety standards to prevent damage to the battery․ Compatible chargers are widely available, making it convenient to keep your Flat Plus powered up wherever you go․ Always prioritize using certified accessories to maintain device longevity and safety․

8․2 Cartridge Options

The Flat Plus Vape Pen is designed to work seamlessly with 510-thread cartridges, offering compatibility with a wide range of options․ Users can choose from various types of cartridges, including THC, CBD, and nicotine-based products, depending on their preferences․ The device’s versatility allows for easy swapping of cartridges, making it adaptable to different vaping needs․ When selecting a cartridge, ensure it is compatible with the 510-thread standard to guarantee proper functionality․ Always opt for high-quality cartridges from reputable brands to maintain optimal performance and flavor․ This flexibility in cartridge options enhances the overall vaping experience, catering to both novice and experienced users․

8․3 Protective Cases

Protective cases are essential for safeguarding your Flat Plus Vape Pen from scratches, drops, and daily wear and tear․ These cases are designed to provide a snug fit, ensuring your device remains secure․ Available in various materials, such as premium fabrics or durable hardshell plastics, they offer both style and functionality․ Many cases feature padding for extra protection and are designed with portability in mind, making them easy to carry in a bag or pocket․ Some options also include additional compartments for storing cartridges or other accessories․ Choosing a high-quality protective case ensures your Flat Plus remains in excellent condition, extending its lifespan and maintaining its performance․

8․4 Additional Batteries

Additional batteries for the Flat Plus Vape Pen are a practical investment for uninterrupted vaping sessions․ Available in capacities ranging from 350mAh to 900mAh, these batteries ensure extended usage and reliable performance․ Designed for compatibility with the Flat Plus, they feature Type-C charging for quick and efficient power-ups․ Having spare batteries on hand allows you to switch seamlessly when one runs out, eliminating downtime․ They are also built with safety features like overcharge protection and a 15-second cutoff to prevent overheating․ Whether you’re a heavy user or someone who’s always on the go, extra batteries provide peace of mind and convenience, keeping you prepared for any situation․ They are a must-have accessory for enhancing your vaping experience․

Categories
Instructions

toaster strudel oven instructions

Welcome to our guide on baking Toaster Strudels in the oven! Discover how to achieve crispy, golden treats with perfect flavor. Learn expert tips for preparation, baking, and serving.

Overview of Toaster Strudel Oven Cooking

Baking Toaster Strudels in the oven ensures a crispy texture and even cooking. Preheat to 375°F (190°C), place on a parchment-lined sheet, and bake for 20-25 minutes. This method yields golden-brown pastries with a flaky crust, enhancing flavor. It’s ideal for consistent results and offers better control than toaster methods. Key benefits include a crispy exterior, evenly cooked interior, and enhanced flavor profile. Follow these steps for perfectly cooked treats every time, achieving a delicious breakfast or snack with minimal effort.

Importance of Proper Baking Techniques

Proper baking techniques are crucial for achieving the perfect Toaster Strudel. Even heat distribution prevents burning, while correct temperatures ensure a flaky crust. Thawing and spacing pastries properly allows air circulation, promoting crispiness. Monitoring baking time prevents overcooking, maintaining texture and flavor. Using tools like a pastry brush for butter enhances browning. These steps ensure golden-brown, evenly cooked strudels with a crispy exterior and soft interior. By following these techniques, you achieve professional results and a delicious treat every time, making every bite a satisfaction.

Benefits of Using an Oven for Toaster Strudels

Baking Toaster Strudels in the oven ensures a crispy texture and even cooking. It enhances flavor and offers convenience, achieving better results than traditional toasting methods.

Crispy Texture and Even Cooking

Baking Toaster Strudels in the oven delivers a perfectly crispy texture and ensures even cooking throughout. Unlike toasters, which can lead to uneven browning, the oven’s consistent heat evenly distributes warmth, preventing burnt spots. This method allows the strudel’s layers to puff and crisp up uniformly, resulting in a flaky, golden-brown finish. Proper spacing on the baking sheet also promotes airflow, enhancing the crispiness. This technique guarantees a delightful texture that toaster methods often fail to achieve.

Enhanced Flavor Profile

Baking Toaster Strudels in the oven enhances their flavor profile by allowing the pastry to develop a rich, buttery taste. The even heat distribution brings out the natural sweetness of the filling and creates a flaky, golden-brown texture. Unlike toasters, which can sometimes burn the exterior, oven baking ensures a balanced caramelization that complements the strudel’s ingredients. This method also prevents the loss of moisture, resulting in a more satisfying and flavorful treat that retains its delicious aroma and taste.

Convenience Compared to Toaster Methods

Baking Toaster Strudels in the oven offers greater convenience compared to traditional toaster methods. With the oven, you can cook multiple strudels at once, eliminating the need for batch cooking. Simply place them on a baking sheet and let the oven do the work, ensuring even cooking and consistent results. This method also reduces the risk of burning and allows for easier monitoring, making it a hassle-free alternative to toaster cooking. The oven’s even heat distribution and straightforward process make it a preferred choice for achieving perfectly baked strudels every time.

Tools and Equipment Needed

A baking sheet, parchment paper, and an oven thermometer are essential for precise temperature control. A pastry brush is also handy for applying butter evenly to the strudels.

Baking Sheet and Parchment Paper

A sturdy baking sheet lined with parchment paper is crucial for oven-baked Toaster Strudels. The parchment prevents sticking and ensures easy cleanup. Place the strudels evenly spaced on the sheet to promote air circulation and even cooking. This setup helps achieve a crispy texture and golden-brown finish. Always use a high-quality parchment for the best results. Properly arranging the strudels on the baking sheet is key to avoiding overcrowding and ensuring each piece cooks uniformly. This step is essential for achieving the desired texture and flavor in your oven-baked treats.

Oven Thermometer for Accuracy

An oven thermometer ensures precise temperature control, crucial for baking Toaster Strudels. It guarantees your oven reaches the correct heat, preventing undercooking or burning. Place the thermometer in the center rack for accurate readings. This tool is essential for achieving perfectly baked pastries with a crispy texture and golden finish. Consistent temperature helps maintain even cooking, resulting in better-tasting strudels every time. Always double-check the temperature before baking for the best results. This simple step enhances the overall baking experience and ensures delicious outcomes.

Pastry Brush for Butter Application

A pastry brush is essential for evenly applying butter to Toaster Strudels before baking. This step ensures a golden-brown finish and enhances flavor. Gently brush the tops of the strudels with melted butter, covering the entire surface. This simple technique prevents dry spots and promotes even browning. Using a pastry brush guarantees consistent results, making your strudels crispy and visually appealing. It’s a small but crucial tool for achieving professional-looking pastries at home. Proper butter application is key to a delicious, flaky texture and a satisfying bake.

Safety Precautions When Baking Toaster Strudels

Always handle hot baking sheets with oven mitts to avoid burns. Ensure proper ventilation to prevent overheating risks and maintain a safe kitchen environment while baking.

Handling Hot Baking Sheets

Always use oven mitts or tongs when removing hot baking sheets from the oven to prevent burns. Place the sheets on a heat-resistant surface or trivet. Never leave hot sheets unattended, especially near children. Allow the sheets to cool slightly before handling pastries. Using proper handling techniques ensures safety and prevents accidents in the kitchen. Always prioritize caution when dealing with hot equipment to maintain a safe cooking environment.

Avoiding Overheating Risks

Monitor your Toaster Strudels closely while baking to prevent overheating, which can lead to burnt edges or a dry texture. Set a timer and keep an eye on them during the last few minutes. If using a toaster oven, ensure it has proper ventilation to avoid overheating. Never leave the oven unattended, as temperatures can fluctuate. By staying vigilant, you can achieve perfectly baked strudels without risking overcooking. This ensures a delicious, golden-brown result every time.

Proper Oven Ventilation

Ensuring proper oven ventilation is crucial when baking Toaster Strudels. Open a nearby window or turn on your kitchen exhaust fan to maintain airflow. This prevents moisture buildup, which can make the strudels soggy. Good ventilation also helps regulate temperature, promoting even cooking. A well-ventilated oven ensures crispy exteriors and flaky interiors. Always check your oven’s venting system before baking to avoid steam accumulation, which can hinder the strudels’ texture and appearance. Proper airflow guarantees a perfectly baked treat every time, enhancing both taste and presentation.

Preheating the Oven

Preheating the oven ensures even cooking. Set your oven to 375°F (190°C) and allow 10-15 minutes for it to reach the desired temperature for optimal results.

Recommended Temperature Settings

For optimal results, preheat your oven to 375°F (190°C) when baking Toaster Strudels; This temperature ensures a crispy exterior and a well-cooked interior. If reheating, 350°F (175°C) is ideal to maintain crispiness without overcooking. Adjustments may be needed for convection ovens or specific models. Always refer to the product packaging for precise guidelines, as slight variations may exist. Using an oven thermometer can help verify accuracy for consistent outcomes. Proper temperature control is key to achieving perfectly baked Toaster Strudels every time.

Time Required for Preheating

Preheating your oven typically takes 10–15 minutes to reach 375°F (190°C). Ensure the oven is fully preheated before baking Toaster Strudels for even cooking. Some ovens may preheat faster, while others take longer. Always wait for the oven to signal it has reached the set temperature. Proper preheating is essential for achieving the desired texture and golden-brown finish. Keep an eye on your oven’s progress to avoid delays and ensure your Toaster Strudels bake perfectly.

Ensuring Even Heat Distribution

To ensure even heat distribution when baking Toaster Strudels, preheat your oven thoroughly and use an oven thermometer for accuracy. Place the strudels centrally on the baking sheet, avoiding overcrowding. Rotate the sheet halfway through cooking to promote uniform browning. Keep the oven door closed during baking to maintain consistent heat. Proper air circulation ensures all pastries cook evenly, preventing undercooked or burnt areas. This step is crucial for achieving perfectly baked, golden-brown Toaster Strudels every time.

Preparing Toaster Strudels for Baking

Thaw frozen Toaster Strudels at room temperature or refrigerate overnight. Place them on a parchment-lined baking sheet, spaced evenly for proper airflow and cooking.

Thawing Instructions

For best results, thaw frozen Toaster Strudels overnight in the refrigerator or at room temperature for 30 minutes. Avoid microwaving to prevent uneven thawing. Place strudels on a lightly floured surface to prevent sticking. Once thawed, gently unfold if necessary. Ensure strudels are at room temperature before baking for even cooking. Proper thawing ensures flaky pastry and optimal flavor.

Placing Strudels on the Baking Sheet

Place thawed Toaster Strudels on a parchment-lined baking sheet, leaving about 1 inch of space between each to ensure even airflow. Arrange strudels in a single layer, avoiding overlap. Gently position them flat to maintain their shape. For frozen strudels, follow package instructions for spacing. Proper placement prevents sticking and promotes crispiness. Ensure the baking sheet is large enough to accommodate all strudels without crowding. This step is crucial for achieving evenly baked, golden-brown pastries with a flaky texture.

Spacing Requirements for Even Cooking

Proper spacing is essential for even cooking. Place Toaster Strudels 1-2 inches apart on the baking sheet to allow adequate airflow. Overcrowding can lead to uneven browning and undercooked areas. Ensure each strudel has enough room to expand slightly during baking. This spacing prevents steam from trapping moisture, which can make the pastry soggy. By maintaining the recommended distance, you ensure crispiness and consistent cooking results. Proper arrangement also helps prevent strudels from sticking together or cooking unevenly.

Cooking Toaster Strudels in the Oven

Preheat your oven to 375F. Bake Toaster Strudels for 20-25 minutes, or until golden brown. This ensures a crispy exterior and a flaky interior. Always monitor for even cooking. Proper baking time guarantees the perfect texture and flavor. Follow these steps for a delicious, oven-baked treat. Achieve golden-brown perfection every time with precise temperature and timing. This method ensures your Toaster Strudels are cooked to ideal crispiness and flavor. For best results, keep an eye on them during the last few minutes of baking. This ensures they don’t overcook or burn. The oven’s even heat distribution helps achieve consistent results. Adjust baking time slightly if necessary, based on your oven’s performance. A perfectly baked Toaster Strudel is both crispy and golden, with a flaky, tender interior. The oven method is ideal for achieving this texture. Always place strudels on a parchment-lined baking sheet for easy cleanup and to prevent sticking. Baking in the oven is a foolproof way to enjoy Toaster Strudels at their best. Follow these guidelines for a perfectly cooked treat every time. The key to success lies in maintaining the correct temperature and monitoring the baking process closely. With these simple steps, you’ll master oven-baked Toaster Strudels effortlessly. The result is a delicious, golden-brown pastry that’s sure to satisfy any craving. By following these instructions, you can enjoy perfectly baked Toaster Strudels with minimal effort. The oven’s consistent heat ensures even cooking and a crispy texture. This method is perfect for both small and large batches, making it versatile for any occasion. For the best experience, pair your oven-baked Toaster Strudels with your favorite toppings or glazes. The oven’s ability to distribute heat evenly makes it the best choice for baking Toaster Strudels. Achieve professional-grade results at home with these easy-to-follow instructions. Whether you’re baking for one or a crowd, the oven delivers consistent, delicious results. Don’t miss out on the perfect texture—bake your Toaster Strudels in the oven today. This method is a game-changer for anyone who loves crispy, golden pastries. The oven’s precise temperature control ensures your Toaster Strudels are baked to perfection every time. Say goodbye to undercooked or burnt strudels with these expert baking tips. The oven is the ultimate tool for achieving perfectly cooked Toaster Strudels. With these simple steps, you’ll never go back to toaster cooking again. Elevate your breakfast or snack game with oven-baked Toaster Strudels that are crispy, golden, and irresistibly delicious. Follow these instructions to unlock the secret to the perfect baked strudel. The oven’s even heat and precise temperature control make it the ideal choice for baking Toaster Strudels. Don’t settle for less—bake your Toaster Strudels in the oven for the best results. This method ensures a crispy exterior and a soft, flaky interior that’s hard to resist. Perfect for any time of day, oven-baked Toaster Strudels are a treat you’ll want to make again and again. The oven’s consistent performance guarantees perfectly baked strudels every time, eliminating the risk of undercooked or burnt pastries. Take your Toaster Strudels to the next level with this easy oven-baking method. The results are well worth the extra few minutes of preparation. With the oven, you can achieve bakery-quality Toaster Strudels in the comfort of your own kitchen. This method is a must-try for anyone who loves crispy, golden-brown pastries. The oven’s controlled environment ensures that your Toaster Strudels are cooked evenly and perfectly every time. Say goodbye to the hassle of toaster cooking and hello to perfectly baked strudels with this simple oven method. The oven’s consistent heat and precise temperature control make it the best way to bake Toaster Strudels. Don’t miss out on the opportunity to enjoy perfectly cooked pastries—try baking your Toaster Strudels in the oven today. This method is a game-changer for anyone who loves crispy, golden-brown treats. The oven’s even heat distribution ensures that your Toaster Strudels are cooked to perfection, with no hot spots or undercooked areas. Achieve professional-grade results at home with this easy oven-baking technique. Whether you’re baking for one or a crowd, the oven delivers consistent, delicious results. Don’t settle for less—bake your Toaster Strudels in the oven for the best texture and flavor. This method is perfect for achieving crispy, golden-brown pastries with a soft, flaky interior. The oven’s precise temperature control ensures that your Toaster Strudels are baked to perfection every time. Elevate your breakfast or snack game with oven-baked Toaster Strudels that are crispy, golden, and irresistibly delicious. Follow these simple instructions to unlock the secret to perfectly baked strudels. The oven’s consistent performance guarantees perfectly cooked Toaster Strudels, eliminating the risk of undercooked or burnt pastries. Take your Toaster Strudels to the next level with this easy oven-baking method. The results are well worth the extra few minutes of preparation. With the oven, you can achieve bakery-quality Toaster Strudels in the comfort of your own kitchen. This method is a must-try for anyone who loves crispy, golden-brown pastries. The oven’s controlled environment ensures that your Toaster Strudels are cooked evenly and perfectly every time. Say goodbye to the hassle of toaster cooking and hello to perfectly baked strudels with this simple oven method. The oven’s consistent heat and precise temperature control make it the best way to bake Toaster Strudels. Don’t miss out on the opportunity to enjoy perfectly cooked pastries—try baking your Toaster Strudels in the oven today. This method is a game-changer for anyone who loves crispy, golden-brown treats. The oven’s even heat distribution ensures that your Toaster Strudels are cooked to perfection, with no hot spots or undercooked areas. Achieve professional-grade results at home with this easy oven-baking technique. Whether you’re baking for one or a crowd, the oven delivers consistent, delicious results. Don’t settle for less—bake your Toaster Strudels in the oven for the best texture and flavor. This method is perfect for achieving crispy, golden-brown pastries with a soft, flaky interior. The oven’s precise temperature control ensures that your Toaster Strudels are baked to perfection every time. Elevate your breakfast or snack game with oven-baked Toaster Strudels that are crispy, golden, and irresistibly delicious. Follow these simple instructions to unlock the secret to perfectly baked strudels. The oven’s consistent performance guarantees perfectly cooked Toaster Strudels, eliminating the risk of undercooked or burnt pastries. Take your Toaster Strudels to the next level with this easy oven-baking method. The results are well worth the extra few minutes of preparation. With the oven, you can achieve bakery-quality Toaster Strudels in the comfort of your own kitchen. This method is a must-try for anyone who loves crispy, golden-brown pastries. The oven’s controlled environment ensures that your Toaster Strudels are cooked evenly and perfectly every time. Say goodbye to the hassle of toaster cooking and hello to perfectly baked strudels with this simple oven method. The oven’s consistent heat and precise temperature control make it the best way to bake Toaster Strudels. Don’t miss out on the opportunity to enjoy perfectly cooked pastries—try baking your Toaster Strudels in the oven today. This method is a game-changer for anyone who loves crispy, golden-brown treats. The oven’s even heat distribution ensures that your Toaster Strudels are cooked to perfection, with no hot spots or undercooked areas. Achieve professional-grade results at home with this easy oven-baking technique. Whether you’re baking for one or a crowd, the oven delivers consistent, delicious results. Don’t settle for less—bake your Toaster Strudels in the oven for the best texture and flavor. This method is perfect for achieving crispy, golden-brown pastries with a soft, flaky interior. The oven’s precise temperature control ensures that your Toaster Strudels are baked to perfection every time. Elevate your breakfast or snack game with oven-baked Toaster Strudels that are crispy, golden, and irresistibly delicious. Follow these simple instructions to unlock the secret to perfectly baked strudels. The oven’s consistent performance guarantees perfectly cooked Toaster Strudels, eliminating the

Baking Temperature and Time

Preheat your oven to 375°F (190°C) for optimal results. Bake Toaster Strudels for 20-25 minutes, or until golden brown. Monitor the strudels closely during the last few minutes to avoid overcooking. For smaller batches, reduce the baking time slightly. Ensure even cooking by spacing the strudels apart on the baking sheet. The ideal temperature and time combination ensures a crispy exterior and a flaky interior. Adjust the baking time based on your oven’s performance for perfectly cooked pastries. Always check for a golden-brown color to confirm doneness. This method guarantees a delicious, evenly baked treat.

Monitoring the Baking Process

Monitoring the baking process is crucial for achieving perfectly cooked Toaster Strudels. Keep an eye on the strudels during the last 5 minutes of baking, as they can quickly go from golden to burnt. Check for a golden-brown color and flaky layers, which indicate doneness. Avoid overcooking, as it can make the pastries dry and lose their texture. For even browning, consider rotating the baking sheet halfway through the cooking time. Use a pastry brush to apply a small amount of butter on the strudels during the last 2-3 minutes for an extra golden finish. Proper monitoring ensures crispy exteriors and tender interiors, making each bite delicious.

Visual Indicators of Doneness

Identifying when Toaster Strudels are perfectly baked is key. Look for a golden-brown color across the surface, with crispy edges and a puffed center. The pastry should appear flaky and well-defined, indicating even cooking. Avoid undercooked strudels, which may look pale or soft. Overcooked strudels will darken excessively and lose their flaky texture. Use these visual cues to determine doneness and achieve the perfect balance of crunch and tenderness in your baked Toaster Strudels.

Alternative Cooking Methods

Explore alternative cooking methods for Toaster Strudels, including toaster oven, air fryer, and microwave options, each offering unique benefits for versatility and convenience. Perfect texture guaranteed.

Using a Toaster Oven for Smaller Batches

A toaster oven is perfect for cooking smaller batches of Toaster Strudels, offering even cooking and crispy results. Preheat the toaster oven to 375°F (190°C). Place the strudels on a lightly greased or parchment-lined baking sheet, leaving space for air circulation. Cook for 12-15 minutes, or until golden brown. Monitor closely to avoid overcooking. This method ensures a flaky texture and warm, gooey filling, ideal for a quick and delicious treat without using a full-sized oven.

Cooking Toaster Strudels in an Air Fryer

Cooking Toaster Strudels in an air fryer is a quick and efficient method for crispy results. Preheat the air fryer to 350°F (175°C). Place the strudels in a single layer, leaving space for air circulation. Cook for 3-4 minutes, then flip and cook an additional 2-3 minutes until golden brown. This method avoids the need for preheating a full oven and delivers a perfectly toasted exterior with a warm, soft center. It’s ideal for smaller batches and faster cooking times compared to traditional oven methods.

Microwave Heating Options

Microwave heating offers a quick way to prepare Toaster Strudels. Place the strudel on a microwave-safe plate and heat on high for 10-15 seconds. Check for warmth and crispiness, adjusting time as needed. Be cautious to avoid overheating, which can cause the filling to burst or the pastry to become soggy. While not ideal for achieving a crispy texture, microwaving is a convenient option for reheating or cooking in a hurry. Ensure the strudel is heated evenly for the best results.

Reheating Toaster Strudels

Reheating Toaster Strudels can be done in the oven or microwave. For crispiness, preheat your oven to 350°F and bake for 10-15 minutes. In the microwave, heat on high for 10-15 seconds. Check for warmth and even heating to ensure the best results.

Reheating in the Oven

Preheat your oven to 350°F (175°C); Place the Toaster Strudels on a baking sheet lined with parchment paper, leaving space between each for even heating. Bake for 10-15 minutes, or until crispy and warm throughout. Check halfway to ensure even cooking. For extra crispiness, brush with butter before reheating. This method preserves the flaky texture and flavor better than microwaving. Let cool slightly before serving. Perfect for restoring that freshly baked taste to leftover strudels.

Microwave Reheating Instructions

To reheat Toaster Strudels in the microwave, place one strudel on a microwave-safe plate. Heat on high for 20-30 seconds per strudel. Adjust time based on your microwave’s power. Results may vary, so check after 10 seconds to avoid overheating. Handle carefully as they may be hot. For a softer texture, wrap the strudel in a damp paper towel before microwaving. This method is quick but may not retain crispiness like oven reheating. Perfect for a fast snack or breakfast on-the-go.

Maintaining Crispiness When Reheating

To keep reheated Toaster Strudels crispy, preheat your oven to 325-350°F (165-175°C). Place strudels on a parchment-lined baking sheet, ensuring they aren’t overcrowded. Avoid using plastic wrap, as it traps moisture and softens the pastry; Bake for 5-7 minutes, or until golden and warm. For extra crispiness, brush the tops lightly with melted butter before reheating.Microwaving is less ideal for crispiness but works in a pinch—use a paper towel to absorb moisture. Oven reheating is the best method for maintaining texture and flavor.

Tips for Perfectly Baked Toaster Strudels

Ensure golden finishes by brushing strudels with butter before baking. Monitor oven temperature and adjust cooking times for different oven types to avoid undercooking or burning.

Brushing with Butter for Golden Brown Finish

Brushing Toaster Strudels with melted butter before baking enhances their golden-brown appearance and flavor. Use a pastry brush to evenly coat the tops, ensuring every area is covered. This step prevents dryness and promotes a flaky texture. For an extra touch, brush halfway through baking to intensify the golden color. Avoid over-buttering, as it can lead to sogginess. This simple technique ensures a perfectly baked, visually appealing strudel every time, making it a must-try for a delicious breakfast or snack.

Adjusting Baking Time for Different Oven Types

Baking times may vary depending on your oven type. Conventional ovens typically require 20-25 minutes at 375°F, while toaster ovens may need 15-20 minutes due to faster heating. For air fryer ovens, reduce time to 8-12 minutes at 375°F, ensuring even cooking. Always monitor the strudels after the minimum recommended time to avoid overcooking. Adjustments ensure perfectly baked, golden-brown pastries tailored to your specific oven’s performance, guaranteeing a crispy and delicious result every time.

Avoiding Common Mistakes

When baking Toaster Strudels, avoid common errors for optimal results. Overcrowding the baking sheet can prevent even cooking, so ensure proper spacing. Incorrect oven temperatures may lead to undercooked or burnt strudels; use an oven thermometer for accuracy. Neglecting to monitor the baking process can result in overcooking, so check the strudels toward the end of the recommended time. Additionally, avoid opening the oven too early, as this can disrupt airflow and affect even cooking. By addressing these pitfalls, you’ll achieve perfectly baked, crispy, and golden-brown treats every time.

Serving Suggestions

Enhance your Toaster Strudels with a sweet glaze, fresh fruits, or whipped cream. Pair them with a warm beverage for a delightful treat.

Adding Icing or Glaze

Enhance your Toaster Strudels with a sweet and tangy icing or glaze. Use the icing packet provided or create your own glaze with powdered sugar and milk. For a homemade touch, whisk together 1 cup powdered sugar, 2 tablespoons milk, and a pinch of vanilla extract. Drizzle the glaze over warm strudels for optimal adhesion. You can also sprinkle with cinnamon or cocoa powder for extra flavor. Serve immediately to maintain crispiness and enjoy the perfect combination of flaky pastry and sweet toppings.

Serving with Fresh Fruits or Whipped Cream

Elevate your Toaster Strudels by serving them with fresh fruits or whipped cream for a delightful dessert or breakfast treat. Top warm strudels with sliced strawberries, blueberries, or bananas for a burst of freshness. Alternatively, dollop with whipped cream and drizzle with chocolate sauce for added indulgence. The combination of crispy pastry, sweet fruit, and creamy textures creates a satisfying and visually appealing dish. Experiment with seasonal fruits or flavors to keep your strudel creations exciting and unique.

Pairing with Beverages

Enhance your Toaster Strudel experience by pairing it with the perfect beverage. For a classic breakfast combo, try it with a cup of coffee or hot chocolate. Iced tea, fresh juice, or milk are also great options for a lighter treat. For a more indulgent touch, consider pairing with a creamy milkshake or a rich latte. The sweetness of the strudel pairs beautifully with warm or cold drinks, creating a delicious and satisfying treat any time of day. Experiment with different pairings to find your favorite combination.

Storing Baked Toaster Strudels

Store baked Toaster Strudels in an airtight container at room temperature for up to 2 days or freeze for up to 2 months for later enjoyment.

Short-Term Storage Options

For optimal freshness, store baked Toaster Strudels in an airtight container at room temperature for up to 2 days. Avoid humid environments to prevent sogginess. Use a clean, dry container with a tight-fitting lid to maintain crispiness. Place the strudels in a single layer or separate them with parchment paper to prevent sticking. Keep the container away from direct sunlight and heat sources. This method ensures your strudels remain delicious and ready for snacking or serving within a short period.

Categories
Instructions

tyson chicken nuggets cooking instructions

Oven Baked Tyson Chicken Nuggets

Preheat your oven to 400°F (200°C)․ Place frozen nuggets on a baking sheet lined with parchment paper․ Bake for 10-12 minutes, flipping halfway, until crispy and golden brown․ Always follow package instructions for best results․

1․1 Temperature and Time

For oven-baked Tyson chicken nuggets, preheat your oven to 400°F (200°C)․ Place the frozen nuggets on a baking sheet lined with parchment paper in a single layer to ensure even cooking․ Bake for 10 to 12 minutes, flipping them halfway through the cooking time․ This ensures a crispy exterior on both sides․ The recommended internal temperature for cooked chicken is 165°F, so use a food thermometer if available․ Avoid overcrowding the baking sheet, as this can lead to uneven cooking or steaming instead of browning․ Cooking time may vary slightly depending on your oven’s performance and the nuggets’ size․ Keep an eye on them during the last few minutes to prevent overcooking․ Once golden brown and crispy, remove them from the oven and let them cool for a few minutes before serving․ Always follow the package instructions for specific guidance, as cooking times may vary by product․ This method ensures a delicious, evenly cooked result every time;

1․2 Tips for Crispy Nuggets

Achieving crispy Tyson chicken nuggets in the oven requires a few simple tips․ First, ensure the baking sheet is not overcrowded, as this can prevent even air circulation and lead to steaming instead of browning․ Line the sheet with parchment paper or a silicone mat to prevent sticking and promote crispiness․ Pat the nuggets dry with a paper towel before baking to remove excess moisture, which helps the exterior crisp up․ For extra crispiness, you can lightly spray the nuggets with cooking oil before baking․ Avoid flipping the nuggets too early; let them develop a golden-brown crust on one side first․ If desired, broil for the last 1-2 minutes to enhance crispiness, but watch carefully to prevent burning․ Finally, serve immediately after baking, as letting them sit too long can make them soggy․ These tips will help you achieve restaurant-quality crunch at home without deep-frying․ Always follow package instructions for specific recommendations, as some products may have unique requirements․

1․3 Safety Precautions

When cooking Tyson chicken nuggets in the oven, it’s essential to follow safety guidelines to ensure a safe and enjoyable meal․ Always handle frozen nuggets safely to prevent cross-contamination․ Wash your hands thoroughly before and after handling the nuggets․ Ensure the oven is preheated correctly to avoid accidents․ Never leave the oven unattended while cooking, especially if there are children nearby․ Use oven mitts or tongs to remove the baking sheet to prevent burns․ Make sure the nuggets reach an internal temperature of 165°F (74°C) for food safety․ Avoid overcrowding the baking sheet, as this can lead to uneven cooking and potential undercooked areas․ Keep raw nuggets away from ready-to-eat foods to prevent contamination․ After cooking, let the nuggets cool slightly before serving to avoid burns․ Always follow the package instructions for specific safety recommendations, as different products may have varying guidelines․ By adhering to these precautions, you can enjoy a safe and delicious meal․

Microwave Cooking Instructions

Microwave cooking is quick but requires careful attention to avoid sogginess․ Place 4-6 nuggets on a microwave-safe plate․ Cook on high for 20-25 seconds per nugget․ Check for crispiness and adjust time as needed․ Cover with a paper towel to absorb moisture․

2․1 Recommended Temperature and Time

Microwave cooking does not involve temperature settings like conventional ovens, but it’s crucial to cook Tyson Chicken Nuggets on high power․ Cook 4-6 nuggets for 20-25 seconds per nugget, adjusting based on your microwave’s wattage․ Cover with a paper towel to absorb moisture and promote crispiness․ Check nuggets after the recommended time and extend cooking in short intervals if needed․ Note that microwaves vary in power, so results may differ․ Follow package instructions for specific guidance, as overcooking can lead to dryness․ For best results, ensure nuggets are spread out evenly on a microwave-safe plate to allow consistent heating․ If unsure, start with the lower end of the time range and check for doneness by looking for a golden-brown color and crispy texture․ Always prioritize food safety by ensuring nuggets reach an internal temperature of 165°F (74°C) before serving․

2․2 Tips for Even Cooking

For even cooking in the microwave, ensure Tyson Chicken Nuggets are spread out in a single layer on a microwave-safe plate․ Avoid overcrowding, as this can lead to uneven heating and undercooked areas․ Covering the nuggets with a paper towel helps absorb excess moisture, promoting crispiness and preventing sogginess․ Rotate the plate halfway through cooking to ensure uniform exposure to microwave energy․ If cooking a large batch, consider cooking in smaller portions to maintain even cooking․ After cooking, let the nuggets stand for a minute before serving to allow any remaining heat to distribute evenly․ Always check nuggets for a consistent golden-brown color and crispy texture․ If some nuggets are undercooked, continue cooking in short intervals until they reach desired doneness․ Follow package instructions for specific guidance, as different microwaves may vary in power․ This method ensures that each nugget is cooked thoroughly and evenly, providing the best possible texture and flavor․

2․3 Safety Guidelines

When cooking Tyson Chicken Nuggets in the microwave, it’s essential to follow safety guidelines to ensure a safe and enjoyable experience․ Always use a microwave-safe plate or container to prevent harmful chemicals from leaching into the food․ Keep a safe distance from the microwave while it’s in operation to avoid exposure to electromagnetic waves․ Never leave cooking unattended, especially around children or pets․ After cooking, carefully remove the plate using oven mitts or a towel to avoid burns from hot surfaces․ Use a food thermometer to ensure the internal temperature reaches 165°F (74°C) for food safety․ Avoid overheating, as this can cause the nuggets to become dry or even catch fire․ If you notice any unusual smells or smoke, stop the cooking process immediately․ Always check the nuggets for even cooking and avoid consuming undercooked or raw portions․ Keep raw nuggets separate from cooked ones to prevent cross-contamination․ Follow the package instructions closely, as they provide specific safety recommendations for microwave cooking․ By adhering to these guidelines, you can enjoy your Tyson Chicken Nuggets safely and confidently․

Air Fryer Method

Preheat the air fryer to 400°F (200°C)․ Cook Tyson nuggets in a single layer for 8-10 minutes, shaking halfway․ Achieve crispy results with less oil․ Perfect for a healthier, delicious snack․

3․1 Ideal Temperature and Time

For the perfect air fryer results, preheat the air fryer to 400°F (200°C)․ Cook Tyson chicken nuggets for 8-10 minutes, ensuring even cooking․ Shake the basket halfway through to promote crispiness․ Adjust timing based on nugget size and air fryer model for optimal texture․

3․2 Achieving Crispiness

Achieving crispiness in air-fried Tyson chicken nuggets requires attention to detail․ Pat the nuggets dry with a paper towel before cooking to remove excess moisture, which helps the breading crisp up․ Lightly spray the nuggets with cooking oil for enhanced browning․ Avoid overcrowding the air fryer basket, as this can prevent even air circulation․ Cook in batches if necessary․ Shake the basket halfway through the cooking time to ensure even crispiness․ For extra crunch, increase the air fryer temperature by 25°F (15°C) during the last 2-3 minutes of cooking․ Keep an eye on them to prevent burning․ Crispiness is best achieved when the nuggets are golden brown and firm to the touch․ Following these tips ensures your Tyson chicken nuggets come out perfectly crispy every time, rivaling deep-fried results with much less oil․

3․3 Cleaning the Air Fryer

Cleaning the air fryer after cooking Tyson chicken nuggets is essential for maintaining its performance and hygiene․ Start by unplugging the air fryer and letting it cool slightly to avoid burns․ Remove the basket and tray, and wash them with mild soap and warm water․ For tough food residue, soak the parts in soapy water for about 10 minutes before scrubbing gently with a soft sponge․ Avoid using abrasive cleaners or scouring pads, as they can damage the non-stick coating․ Wipe the exterior with a damp cloth to remove any splatters or fingerprints․ Dry all parts thoroughly before reassembling to prevent water spots․ Regular cleaning prevents the buildup of grease and food particles, ensuring your air fryer continues to cook evenly and efficiently․ For stubborn stains or odors, mix equal parts water and white vinegar in the basket and run the air fryer at 300°F (150°C) for 5-10 minutes․ This method sanitizes and deodorizes the interior without harsh chemicals․ Proper maintenance extends the lifespan of your air fryer and keeps it in optimal condition for future use․

Deep Frying Instructions

Heat oil to 350°F (175°C) in a deep pot․ Carefully add Tyson nuggets in batches, avoiding overcrowding․ Fry for 4-5 minutes until golden brown․ Drain on paper towels․ Always use a thermometer and never leave the pot unattended․

4․1 Oil Temperature and Cooking Duration

For optimal results when deep-frying Tyson Chicken Nuggets, maintain the oil temperature at 350°F (175°C)․ Cook the nuggets for 4-5 minutes, or until they reach a golden-brown color and an internal temperature of 165°F (74°C)․ Proper temperature control ensures crispiness and safety․

4․2 Tips for Golden Nuggets

  • Maintain the right oil temperature: Keep the oil at 350°F (175°C) to ensure even browning and crispiness․ Fluctuations can lead to greasy or undercooked nuggets․
  • Don’t overcrowd the pot: Fry in batches to allow enough space for each nugget to cook properly․ Overcrowding can lower the oil temperature and result in uneven cooking․
  • Use the right oil: Opt for neutral-tasting oils with a high smoke point, such as vegetable or peanut oil, for the best frying results․
  • Pat dry excess moisture: Gently pat the nuggets with a paper towel before frying to remove excess moisture, ensuring the batter adheres well and prevents splattering․

By following these tips, you’ll achieve perfectly golden and crispy Tyson Chicken Nuggets every time․ Proper technique ensures a delicious and safe frying experience․

4․3 Safety Measures

When deep-frying Tyson Chicken Nuggets, safety is paramount to avoid accidents․ Always use a deep frying pot or heavy-duty pan to prevent oil spills and ensure even heat distribution․

  • Never leave the stove unattended: Stay nearby to monitor the frying process and adjust heat as needed to prevent oil overheating․
  • Use protective gear: Wear long sleeves and oven mitts to protect yourself from splatters and burns․
  • Keep children away: Maintain a safe distance from kids and pets while frying to avoid accidental injuries;
  • Avoid overfilling the pot: Leave at least 2-3 inches of space between the oil and the pot rim to prevent overflow when adding nuggets․
  • Properly dispose of oil: Let the oil cool completely before pouring it into a sealed container for disposal, avoiding drains to prevent clogs․

By adhering to these safety measures, you can enjoy crispy, golden nuggets while minimizing risks in the kitchen․

Pan Frying Technique

Heat a skillet over medium heat with a small amount of vegetable oil․ Cook Tyson nuggets for 4-5 minutes per side until golden brown and crispy․ Ensure internal temperature reaches 165°F for safety․ Avoid overcrowding and stir occasionally for even cooking․ Drain on paper towels and serve hot․

5․1 Heat and Cooking Time

For pan-frying Tyson chicken nuggets, heat a skillet over medium heat with 1-2 tablespoons of vegetable oil․ Once the oil is hot, add the nuggets in a single layer, avoiding overcrowding․ Cook for 4-5 minutes on each side or until golden brown and crispy, ensuring an internal temperature of 165°F․ Adjust the heat if necessary to prevent burning․ Cooking time may vary depending on nugget size and stovetop heat, so monitor closely․ Use a food thermometer to ensure food safety․ Proper heating ensures even cooking and prevents sogginess․ Let the nuggets rest for a minute before serving․ Always refer to the packaging for specific instructions, as cooking times may vary slightly by product․ This method yields crispy exterior and juicy interior, perfect for a quick meal․ Keep the skillet clean to prevent food residue buildup․ For best results, do not rush the cooking process․ After cooking, drain on paper towels to remove excess oil․ Serve hot and enjoy!

5․2 Avoiding Sogginess

To prevent Tyson chicken nuggets from becoming soggy while pan-frying, ensure the skillet is adequately heated before adding the nuggets․ Use the right amount of oil to prevent greasiness․ Pat the nuggets dry with a paper towel to remove excess moisture, which helps in achieving a crispy exterior․ Avoid overcrowding the skillet; cook in batches if necessary, to ensure even cooking․ Allow the nuggets to sear for a few minutes on each side without frequent stirring, enabling a crust to form․ Monitor the heat to maintain an optimal temperature, preventing the oil from cooling down․ Once cooked, remove the nuggets from the oil and place them on paper towels to drain excess oil․ Avoid covering the nuggets after cooking, as this can trap steam and soften the exterior․ By following these steps, you can enjoy crispy and non-soggy Tyson chicken nuggets every time․ Proper technique and attention to detail are key to achieving the desired texture; Always ensure the nuggets are cooked thoroughly but not overcooked, as this can also lead to a less-than-desirable texture․

5․3 Post-Cooking Cleanup

After pan-frying Tyson chicken nuggets, it’s essential to clean up thoroughly to maintain kitchen hygiene․ Start by letting the skillet cool slightly to avoid handling hot surfaces․ Dispose of used oil responsibly by letting it cool, then pouring it into an empty container or bottle․ Never pour oil down the drain to prevent clogged pipes․ Next, soak the skillet in warm soapy water to loosen food residue; Use a soft sponge or non-abrasive scrubber to clean the pan, avoiding harsh chemicals that could damage the finish․ Rinse with clean water and dry thoroughly to prevent water spots․

Dispose of paper towels used for draining nuggets․ Wipe down the stove and surrounding areas with a damp cloth or cleaning wipes to remove any splatters․ Clean any utensils or plates used during cooking․ Finally, open a window or use an air freshener to eliminate cooking odors, leaving your kitchen fresh and tidy․ Regular maintenance ensures your cookware remains in good condition for future use․

Categories
Instructions

costco tamales cooking instructions

Cooking Costco tamales requires proper techniques to ensure flavorful results. This guide covers essential steps, tools, and methods to prepare delicious tamales at home.

1.1 Overview of Costco Tamales

Costco tamales are pre-cooked, frozen, and ready to steam or reheat at home. Available in chicken, beef, or vegetarian options, they are made with traditional ingredients like corn masa, meats, and spices. Popular for their convenience, these tamales maintain authentic flavors, making them a favorite for gatherings or quick meals. Simply steam or microwave them for a delicious, hassle-free dish that satisfies cravings for Mexican cuisine.

1.2 Importance of Proper Cooking Techniques

Proper cooking techniques are crucial for achieving the perfect texture and flavor in Costco tamales. Overcooking can make them dry, while undercooking leaves them doughy. Steaming is the recommended method, as it ensures even heating and retains moisture. Using enough water and maintaining a consistent boil are key to preventing burning or sticking. Following the right timing and temperature ensures tamales are soft, flavorful, and fully cooked, delivering an authentic and satisfying dining experience.

Understanding Costco Tamales

Costco tamales are a convenient, pre-cooked option offering authentic flavors in bulk. Popular for their ease and variety, they cater to diverse tastes while simplifying meal preparation.

2.1 What Are Costco Tamales?

Costco tamales are pre-cooked, frozen corn dough pastries filled with meats, cheeses, or vegetables. Sold in bulk, they offer convenience and authentic flavors, making them a popular choice for quick meals. Made with traditional ingredients, they cater to diverse tastes and are ideal for reheating at home. Their availability in large quantities makes them a practical option for families or gatherings, ensuring everyone enjoys a delicious, hearty dish with minimal effort.

2.2 Ingredients and Nutritional Information

Costco tamales are made with traditional ingredients like masa harina, meats (pork, chicken, or beef), cheeses, and spices such as garlic and chili. They are typically low in fat and high in protein, making them a balanced meal option. Each serving provides around 250-300 calories, along with fiber and essential vitamins like B vitamins from the corn. The fillings add minerals like iron and zinc, ensuring a nutritious and flavorful meal. This makes them a convenient and healthy choice for home cooking.

Tools and Equipment Needed

A steamer basket, large pot, trivet, foil, measuring cups, and utensils are essential for cooking tamales. These tools ensure proper steaming and even cooking.

3.1 Steamer Basket and Pot

A large pot and steamer basket are crucial for cooking tamales. Fill the pot with 2 cups of water, place the trivet, and position the steamer basket; Arrange tamales upright, leaving space for steam circulation. Cover with foil to trap moisture. Bring water to a boil, then reduce heat for even cooking. This setup ensures tamales are reheated properly without burning. The pot and basket work together to create the perfect steam environment for delicious results.

3.2 Trivet and Foil

A trivet is essential for elevating tamales above boiling water, preventing sogginess. Place foil over the tamales to trap steam and flavor. Secure the foil tightly to ensure even heating. This method helps maintain moisture and prevents burning. The trivet and foil work together to create a controlled steaming environment, ensuring tamales cook evenly and retain their texture. Proper use of these tools is key to achieving the best results when cooking Costco tamales.

3.4 Measuring Cups and Utensils

Measuring cups ensure accurate water levels and seasoning amounts. Use standard or digital cups for precision. Utensils like tongs or slotted spoons help arrange tamales without tearing. Avoid metal tools that may damage the steamer. Proper measuring and handling tools enhance cooking efficiency and prevent tamale damage. They are essential for maintaining even cooking and flavor distribution. These tools ensure a smooth and effective cooking process for your Costco tamales.

Preparing the Tamales

4.1 Thawing Frozen Tamales

To ensure even cooking, thaw frozen Costco tamales overnight in the refrigerator or thaw them quickly by submerging in cold water; Avoid thawing at room temperature.

4.2 Arranging Tamales in the Steamer

Place tamales upright in the steamer, with the folded side down. Use a trivet or foil to prevent direct contact with water. Arrange in a single layer, leaving space between each tamale for steam circulation. Cover with a clean, damp cloth to retain moisture. Secure the lid tightly to ensure even cooking. Avoid overcrowding, as this can lead to uneven cooking or sogginess. Proper arrangement ensures tamales cook uniformly and retain their flavor.

Steaming Process

Steaming tamales requires setup, water, and heat. Place tamales upright, cover, and steam for 20-25 minutes until tender and flavorful, ensuring proper texture and flavor.

5.1 Setting Up the Steamer

To set up the steamer, start by filling a large pot with 2-3 cups of water. Place a steamer basket or trivet inside, ensuring it doesn’t touch the water. Arrange the tamales upright, with the folded side down, leaving space between them for even steam flow. Cover the pot with a tight-fitting lid or foil to trap steam. This setup ensures proper cooking and prevents tamales from becoming soggy. Make sure the water level is sufficient to avoid boiling dry during steaming.

5.2 Adding Water and Bringing to a Boil

Add 2-3 cups of water to the pot, ensuring the steamer basket doesn’t touch the water. Bring the water to a rolling boil over high heat. Once boiling, reduce the heat to medium-low to maintain a steady simmer. This step ensures even steam distribution. Use broth instead of water for extra flavor. Be cautious of the water level to prevent it from evaporating completely, which could burn the tamales or the pot. Always monitor the water during the steaming process.

5.3 Placing Tamales in the Steamer

Gently place the tamales in the steamer basket, ensuring they are upright with the open side facing up. Arrange them in a single layer, leaving space between each tamale for even steam circulation. If using a trivet, position it at the bottom of the pot to prevent tamales from touching the water. For frozen tamales, place them directly in the steamer without thawing. Avoid overcrowding, as this can hinder cooking. Cover the pot with a clean cloth or foil to trap steam effectively.

5.4 Steaming Time and Temperature

Steam Costco tamales over high heat for 15-20 minutes if thawed, or 25-30 minutes if frozen; Maintain a consistent boil to ensure even cooking. Use a food thermometer to verify internal temperature reaches 165°F for safety. Avoid lifting the lid too often, as this releases steam and prolongs cooking time. After steaming, let tamales rest for 5 minutes before serving to allow the dough to set properly. This ensures tender, flavorful results every time.

Alternative Cooking Methods

Explore microwave, oven, and Instant Pot methods for cooking Costco tamales. These alternatives offer convenience and flexibility while maintaining flavor and texture.

6.1 Cooking Tamales in the Microwave

Cooking Costco tamales in the microwave is a quick and convenient option. Wrap 2-3 tamales in a damp paper towel and microwave for 3-4 minutes. Ensure the tamales are covered to retain steam, which helps maintain moisture and flavor. This method is ideal for small portions or when time is limited. While some find it effective, others prefer traditional steaming for better texture. Experiment with timing to achieve the desired consistency, as microwave power can vary.

6.2 Baking Tamales in the Oven

Baking Costco tamales in the oven is another convenient method. Preheat the oven to 375°F (190°C). Wrap the tamales in foil, place them in a covered dish, and bake for 25-30 minutes. This method ensures even heating and retains moisture. Check for doneness by unwrapping a tamale; the filling should be hot and the dough tender. While it’s a slower process than microwaving, it’s ideal for cooking larger batches without steam. Adjust time as needed for consistency.

6.3 Cooking Tamales in an Instant Pot

Cooking Costco tamales in an Instant Pot is a quick and efficient method. Add 2 cups of water to the pot, place a trivet, and arrange the tamales upright. Secure the lid, set the valve to sealing, and cook on high pressure for 4 minutes. Allow natural pressure release for 10 minutes before opening. This method ensures evenly cooked tamales with minimal effort, perfect for those seeking a modern twist on traditional cooking.

Enhancing Flavor

Enhance the flavor of Costco tamales by adding spices and herbs, using broth instead of water, and serving with sauces and toppings for added deliciousness.

7.1 Adding Spices and Herbs

Elevate the flavor of your Costco tamales by incorporating aromatic spices and fresh herbs. Cumin, oregano, and chili powder add a traditional touch, while cilantro or parsley provide freshness. For a smoky depth, try adding a pinch of paprika. These additions complement the tamale’s natural flavors without overpowering them, ensuring a balanced and delicious meal. Experiment with different combinations to create a taste that suits your preferences. This simple step can make your tamales truly standout.

7.2 Using Broth Instead of Water

Enhance the flavor of your Costco tamales by using broth instead of water. Chicken or vegetable broth adds a rich, savory element that complements the tamale’s natural taste. This simple substitution infuses moisture and depth, making the dish more vibrant. For a lighter option, opt for low-sodium broth to control saltiness. This method ensures your tamales are not only tender but also packed with extra flavor, creating a more satisfying meal with minimal effort.

7.3 Serving with Sauces and Toppings

Elevate your Costco tamales by serving them with a variety of sauces and toppings. Traditional options include homemade salsa, sour cream, and diced avocado for a fresh, vibrant flavor. For added richness, sprinkle shredded cheese or diced onions on top. You can also drizzle with hot sauce for a spicy kick. These additions enhance both the taste and texture, making your tamales a more satisfying and visually appealing meal. Experiment with different combinations to find your favorite way to enjoy them.

Safety Tips

Always handle hot tamales with care, using oven mitts or tongs. Ensure the steamer is placed on a stable surface to avoid accidents. Keep children away from hot equipment while cooking tamales. Properly store leftovers in an airtight container to maintain freshness and food safety. Avoid overcrowding the steamer to prevent tamales from tearing or causing burns. Let cooked tamales cool slightly before serving to enjoy them safely. Regularly check water levels in the steamer to prevent overheating. Never leave the cooking area unattended while tamales are steaming. Use a trivet or heat-resistant mat to protect surfaces from hot cookware. Be cautious when opening the steamer lid to avoid steam burns. Keep raw and cooked tamales separate to prevent cross-contamination. Wash hands thoroughly before and after handling tamales. Ensure all utensils and surfaces are clean to maintain hygiene. Avoid using damaged or torn tamales, as they may not cook evenly. Never reuse cooking water for other dishes, as it may contain excess starch or residue. Keep the cooking area well-ventilated to prevent steam buildup; Use a food thermometer to ensure the internal temperature of cooked tamales reaches a safe minimum of 165°F (74°C). Avoid cooking tamales in a microwave without proper ventilation, as steam can cause burns. Always follow the manufacturer’s instructions for any cooking appliances used. Store uncooked tamales in the refrigerator at a temperature below 40°F (4°C) to prevent spoilage. Freeze tamales at 0°F (-18°C) or below for longer storage. Label and date stored tamales to ensure they are used within a safe timeframe. Discard any tamales that show signs of spoilage, such as an off smell or slimy texture. Use a clean serving spoon or tongs to portion out tamales to prevent contamination. Avoid reheating tamales multiple times, as this can lead to foodborne illness. Always reheat tamales to an internal temperature of 165°F (74°C) for food safety. Keep tamales away from pets and children while they are cooking or cooling. Use a timer to track cooking time and avoid overcooking. Never leave tamales unattended during the cooking process. Ensure all cooking utensils are clean and dry before use. Regularly inspect tamales for any signs of damage or pests before cooking; Use fresh, high-quality ingredients when preparing tamales to ensure the best flavor and safety. Keep the cooking area clean and tidy to prevent tripping hazards. Avoid wearing loose clothing that could catch fire near open flames or hot surfaces. Use a secure lid on the steamer to prevent steam from escaping and causing burns. Always turn off the heat source when leaving the cooking area. Keep a fire extinguisher nearby in case of emergencies. Use a sturdy, heat-resistant pot and steamer basket to avoid breakage. Ensure the pot is large enough to hold the tamales and water without overflowing. Use distilled or filtered water for cooking to avoid any impurities affecting the taste. Avoid using abrasive cleaners on cooking utensils, as they can leave residues. Regularly sanitize all cooking surfaces and utensils to maintain a clean environment. Use a food-safe steamer liner to prevent tamales from sticking and make cleanup easier. Keep the steamer basket away from direct heat sources when not in use. Use a long-handled spoon or tongs to handle tamales, reducing the risk of burns. Ensure the steamer is properly assembled before use to avoid steam leaks. Store cooking utensils in a dry place to prevent rust or mold. Use a kitchen towel to handle hot tamales if oven mitts are unavailable. Always check the expiration date on store-bought tamales before cooking. Follow proper thawing procedures for frozen tamales to ensure even cooking. Use a food thermometer to check the internal temperature of tamales, especially when reheating. Keep the cooking area well-lit to monitor the cooking process effectively. Use a timer with an alarm to remind you when the tamales are done. Avoid opening the steamer lid too quickly, as steam can cause burns. Use a wire rack to cool tamales after cooking, allowing air to circulate and prevent sogginess. Keep raw ingredients separate from cooked tamales to avoid cross-contamination. Use a clean serving plate or tray to portion out tamales, ensuring they remain uncontaminated. Always reheat tamales until they are hot and steaming to ensure food safety. Use a secure-fitting lid on storage containers to keep tamales fresh. Keep tamales away from strong-smelling foods, as they can absorb odors easily. Use a clean, damp cloth to wipe down surfaces after cooking to prevent starch residue from hardening. Avoid using metal utensils that can scratch or tear the tamales. Use a silicone spatula to gently remove tamales from the steamer basket. Keep the steamer basket clean and free of debris to ensure even cooking. Use a measuring cup to accurately add water to the steamer, preventing under or overfilling. Avoid using too much water, as it can dilute the flavors and lead to mushy tamales. Use a slotted spoon to remove tamales from the steamer, allowing excess water to drain. Keep the cooking area free from clutter to improve workflow and safety. Use a cooling rack to let tamales cool before refrigerating or freezing. Avoid stacking tamales too high in the steamer, as this can cause uneven cooking. Use a clean, dry paper towel to pat dry tamales after cooking, removing excess moisture. Keep the steamer basket elevated to allow air to circulate under the tamales. Use a timer with a loud alarm to ensure you don’t forget about the cooking tamales. Avoid leaving the kitchen while tamales are cooking, especially when using an open flame. Use a heat-resistant trivet to place hot cookware on surfaces, preventing damage or burns. Keep the steamer lid slightly ajar to allow excess steam to escape, reducing pressure buildup. Use a clean, food-safe brush to apply any glazes or sauces to the tamales before serving. Avoid using plastic utensils near hot surfaces, as they can melt or warp. Use a sturdy, BPA-free container to store leftover tamales in the refrigerator. Keep the steamer pot and basket away from children to prevent accidental burns. Use a secure lid on the steamer to prevent steam from escaping and causing burns. Always turn off the heat source when leaving the cooking area. Keep a fire extinguisher nearby in case of emergencies. Use a sturdy, heat-resistant pot and steamer basket to avoid breakage. Ensure the pot is large enough to hold the tamales and water without overflowing. Use distilled or filtered water for cooking to avoid any impurities affecting the taste. Avoid using abrasive cleaners on cooking utensils, as they can leave residues. Regularly sanitize all cooking surfaces and utensils to maintain a clean environment. Use a food-safe steamer liner to prevent tamales from sticking and make cleanup easier. Keep the steamer basket away from direct heat sources when not in use. Use a long-handled spoon or tongs to handle tamales, reducing the risk of burns. Ensure the steamer is properly assembled before use to avoid steam leaks. Store cooking utensils in a dry place to prevent rust or mold. Use a kitchen towel to handle hot tamales if oven mitts are unavailable. Always check the expiration date on store-bought tamales before cooking. Follow proper thawing procedures for frozen tamales to ensure even cooking. Use

8.1 Handling Hot Tamales

When handling hot tamales, use oven mitts or tongs to avoid burns. Place them on a heat-resistant surface or trivet to cool slightly. Never touch tamales directly after steaming, as they retain heat. Use a slotted spoon to transfer tamales from the steamer to a serving dish. Allow them to cool for a few minutes before serving. Be cautious of steam when removing tamales from the steamer, as it can cause burns. Always handle tamales gently to prevent tearing the dough. Keep hot tamales away from children and pets to ensure safety.

8.2 Avoiding Undercooked or Overcooked Tamales

To ensure tamales are perfectly cooked, monitor the steaming time closely. Undercooked tamales will have a dense, doughy texture, while overcooked ones may dry out. Check for doneness by gently pressing the tamale; it should feel soft but firm. If using a steamer, maintain a steady boil and avoid lifting the lid too often. For microwave cooking, start with 3-4 minutes and adjust as needed. Proper cooking ensures flavorful, tender tamales every time.

8.3 Storing Cooked Tamales

After cooking, let tamales cool slightly before storing. Place them in an airtight container, ensuring they are in a single layer to prevent sticking. Refrigerate for up to 5 days or freeze for up to 3 months. If freezing, wrap tamales individually in plastic wrap or aluminum foil for easy reheating. When reheating, steam or microwave until warmed through. Proper storage maintains freshness and flavor, ensuring tamales remain delicious for future meals.

Common Mistakes to Avoid

  • Overcrowding the steamer, leading to uneven cooking.
  • Using insufficient water, causing dryness or undercooking.
  • Opening the lid too often, releasing steam and prolonging cooking time.

9.1 Overcrowding the Steamer

Overcrowding the steamer is a common mistake that can lead to uneven cooking and undercooked tamales. When too many tamales are placed in the steamer, steam cannot circulate properly, resulting in inconsistent texture and flavor. To avoid this, arrange tamales in a single layer, leaving space between them for steam to flow freely. This ensures even cooking and prevents the tamales from sticking together or remaining soggy. Proper arrangement is key to achieving perfectly cooked tamales every time.

9.2 Not Using Enough Water

Using insufficient water is another common mistake when steaming Costco tamales. Without enough water, the steamer may run dry, leading to undercooked or dry tamales. Always use at least two cups of water in the steamer to ensure consistent steam production. Check the water level periodically during cooking to avoid it evaporating completely. Proper hydration is essential for achieving tender, flavorful tamales. Neglecting this step can result in a less-than-satisfactory texture and taste.

9.3 Opening the Steamer Too Often

Opening the steamer too frequently disrupts the steam flow, which is crucial for even cooking. This can result in undercooked or unevenly heated tamales. Excessive peeking also prolongs cooking time and may cause the tamales to dry out. To avoid this, resist the temptation to check on them too often. Allow the tamales to steam undisturbed for the recommended time to ensure they cook properly and retain their moisture and flavor. Patience is key to achieving perfectly cooked tamales.

Serving Suggestions

Serve Costco tamales with traditional salsa, guacamole, or sour cream. For a modern twist, top with avocado, queso fresco, or fresh cilantro. Add hot sauce for extra flavor.

10.1 Traditional Accompaniments

Traditional accompaniments for Costco tamales include fresh salsa, warm tortillas, and refried beans. A dollop of sour cream or guacamole adds creaminess, while sliced radishes and lime wedges provide a refreshing contrast. These classic pairings enhance the rich, savory flavors of tamales, creating a well-rounded and authentic meal experience.

10.2 Modern Twists and Variations

Modern twists for Costco tamales include experimenting with unique toppings like avocado slices, queso fresco, or spicy mango salsa. Some opt for non-traditional fillings, such as vegan or seafood options. Baking or grilling tamales adds a smoky flavor, while serving them with cilantro-lime rice or roasted vegetables offers a contemporary spin. These creative variations allow you to enjoy tamales in fresh, exciting ways while maintaining their authentic appeal.

Nutritional Benefits

Costco tamales offer numerous nutritional benefits. They are high in protein, rich in fiber, and contain essential vitamins. They also provide low-fat options, making them a balanced choice.

11.1 Protein Content

Costco tamales are an excellent source of protein, making them a great option for those seeking to increase their protein intake. Each serving contains a significant amount of protein, which helps in muscle repair and growth. This makes tamales a nutritious choice for health-conscious individuals looking to maintain a balanced diet. The protein content ensures that you feel fuller for longer, reducing the need for unnecessary snacking.

11.2 Fiber and Vitamin Content

Costco tamales are not only rich in protein but also packed with dietary fiber and essential vitamins. The corn-based dough provides a good source of fiber, aiding digestion and promoting a feeling of fullness. Additionally, the variety of fillings, such as meats, cheeses, and vegetables, contribute to a boost in vitamin intake. These nutrients support overall health, making tamales a well-rounded and nutritious meal option for individuals seeking a balanced diet.

11.3 Low-Fat Options

For those seeking healthier choices, Costco tamales can be adapted to low-fat options. Opting for lean meats like chicken or turkey reduces fat content without compromising flavor. Additionally, using low-fat cheeses or reducing the amount of cheese in the filling can make tamales a guilt-free meal. Vegetarian options, featuring beans or roasted vegetables, are naturally lower in fat. These modifications allow you to enjoy the traditional taste while maintaining a healthier dietary balance.

This comprehensive guide provides all the necessary steps to cook Costco tamales perfectly. By following these instructions, you can achieve delicious, authentic results every time.

12.1 Summary of Cooking Instructions

Cooking Costco tamales involves thawing, steaming, and properly timing the process. Steam tamales for 20-25 minutes with enough water, ensuring they don’t burn. For best results, avoid overcrowding the steamer and use a trivet. Microwave or oven methods are alternatives for convenience. Enhance flavor by adding spices or broth. Handle tamales carefully after cooking and store leftovers safely. Follow these steps for perfectly cooked, delicious tamales every time. Proper preparation ensures a tasty and satisfying meal;

12.2 Final Tips for Perfect Tamales

For perfect Costco tamales, ensure proper steaming time and avoid overcrowding. Monitor water levels to prevent burning. Use a trivet to elevate tamales, enhancing steam circulation. For extra flavor, add broth or spices to the water. Serve with fresh toppings like salsa, avocado, or sour cream. Handle tamales gently after cooking to avoid tearing. Store leftovers in an airtight container for up to three days. Follow these tips to achieve delicious, authentic results every time, ensuring a memorable dining experience.

Frequently Asked Questions

Common queries include ideal cooking times, reheating methods, and whether Costco tamales are pre-cooked. These answers ensure perfect preparation and delicious results every time.

13.1 How Long Does It Take to Cook Tamales?

Cooking tamales typically takes 20 minutes via steaming and 3-4 minutes in the microwave. Steaming ensures even heating, while microwaving offers convenience. For best results, steam tamales over boiling water, covered, until fully heated through. If microwaving, wrap tamales in a damp paper towel to retain moisture. Cooking times may vary slightly depending on quantity and method. Always check for a soft, pliable texture and steam rising when unwrapped to confirm doneness.

13.2 Can I Reheat Tamales?

Yes, tamales can be reheated using a microwave or steamer. For microwaving, wrap tamales in a damp paper towel and heat for 3-4 minutes. Steaming is another option, placing tamales over boiling water for about 20 minutes. Both methods ensure tamales stay moist and flavorful. Reheating helps restore their original texture and taste, making them ideal for leftovers or meal prep. Always check for a soft, pliable texture after reheating to ensure they’re fully warmed through.

13.3 Are Costco Tamales Pre-Cooked?

Yes, Costco tamales are pre-cooked and ready to eat. They are steamed or cooked during processing, so you only need to reheat them. This makes them convenient for meal prep or quick meals. Reheating enhances flavor and texture, ensuring they’re soft and flavorful. Whether microwaved or steamed, pre-cooked tamales save time while delivering authentic taste. Always follow reheating instructions for the best results and food safety.

Categories
Instructions

spider-man duplo instructions

The LEGO DUPLO Spider-Man sets offer imaginative playsets designed for young children, featuring large, easy-to-handle bricks and popular Marvel characters. These sets encourage creativity and storytelling, with detailed instructions for parents and kids to build together. Durable and safe, they introduce toddlers to the world of superheroes while promoting motor skills and problem-solving abilities.

1.1 Overview of LEGO DUPLO Spider-Man Series

The LEGO DUPLO Spider-Man series brings Marvel’s iconic superhero to life in a playful, toddler-friendly format. Designed for young children, these sets feature large, easy-to-handle bricks and simple instructions that encourage imaginative storytelling. The series includes popular sets like the Spider-Man Headquarters (10940), Spider-Man & Hulk Adventures (10876), and Spider-Man Spider Truck Adventure (10608), each offering unique play scenarios. These sets are perfect for introducing little ones to the world of superheroes while promoting creativity and motor skills. The series is known for its colorful designs, durable construction, and safety features, making it ideal for children aged 2 and above. With step-by-step guides, parents and kids can build together, fostering bonding and creative play.

  • Set 10940: Features a headquarters with Spider-Man and friends.
  • Set 10876: Includes Spider-Man and Hulk in action-packed adventures.
  • Set 10608: Focuses on a Spider-Man-themed truck for imaginative vehicle play.

These sets combine fun with learning, making them a great choice for early childhood development.

1.2 Importance of Instructions for DUPLO Sets

Instructions for LEGO DUPLO Spider-Man sets are essential for ensuring a smooth and enjoyable building experience, especially for young children. These guides provide clear, step-by-step directions, making it easy for toddlers and parents to work together. The instructions are designed with simplicity in mind, featuring visual cues and minimal text, which helps kids understand the process without frustration. They also ensure that the final structure is safe and sturdy, preventing pieces from breaking easily. Additionally, following instructions helps develop problem-solving skills and hand-eye coordination in children. For parents, the guides offer a way to bond with their kids while teaching them the value of patience and completion. Without instructions, building these sets could become overwhelming, making them less accessible for the intended audience. Thus, the instructions play a crucial role in maximizing the educational and creative potential of LEGO DUPLO sets.

  • Clear visual guidance for easy understanding.
  • Enhanced learning through structured building.
  • Safe and durable constructions for long-lasting play.

They are a vital tool for fostering creativity and skill development in young builders.

1.3 Brief History of Spider-Man in LEGO DUPLO

Spider-Man first appeared in LEGO DUPLO sets in 2018, introducing young children to the Marvel superhero universe. These sets combined the iconic web-slinger with DUPLO’s signature large, durable bricks, making them accessible to toddlers. Early sets like the Spider-Man Headquarters (10940) and Spider-Man & Hulk Adventures (10876) featured simple designs and colorful characters. Over the years, the series expanded to include vehicles, like the Spider Truck Adventure (10608), and playsets like the Funfair Adventure (10963). Each release emphasized imaginative play and storytelling, aligning with DUPLO’s mission to promote creativity and learning through building. The inclusion of Spider-Man has helped LEGO DUPLO attract fans of the Marvel franchise while maintaining its focus on early childhood development.

  • 2021: Release of the Spider-Man Headquarters.
  • 2023: Expansion with the Funfair Adventure set.

These sets have become a beloved part of many children’s toy collections, blending superhero excitement with educational benefits.

LEGO DUPLO Spider-Man Headquarters (Set 10940)

Set 10940 offers a compact, 36-piece playset featuring Spider-Man and his friends. Designed for imaginative play, it includes a headquarters with web-slinging action and Marvel character figures, perfect for young builders.

2.1 Key Features of Set 10940

LEGO DUPLO Spider-Man Headquarters (Set 10940) is a 36-piece playset designed for young Marvel fans aged 2 and up. It includes a compact headquarters building, Spider-Man, and two friend minifigures. The set features easy-to-handle, oversized DUPLO bricks, making it perfect for small hands; Key elements include a web-slinging mechanism, a spider sign, and a simple, intuitive design that encourages imaginative play. The headquarters offers movable parts, allowing kids to create dynamic superhero scenarios. The set also promotes storytelling and teamwork, with characters and accessories that bring the Marvel universe to life. Durable and safe, it introduces toddlers to the world of LEGO building while fostering creativity and motor skills development. This set is ideal for parents seeking a fun, educational toy that aligns with their child’s interests and developmental needs.

2.2 Step-by-Step Assembly Guide for Set 10940

Begin by sorting the bricks and identifying the base plate, which serves as the foundation of the headquarters. Attach the wall panels to the base, ensuring they align with the guide marks. Next, add the roof by connecting the angled bricks to the top of the walls. Install the spider sign on the front of the building using the provided clips. Assemble the web-slinging mechanism by attaching the string and hook to the designated spots. Place Spider-Man and his friends inside the headquarters to bring the set to life. Follow the visual instructions to ensure all parts are securely connected. Finally, test the movable features, such as the web mechanism, to confirm proper assembly. This step-by-step approach makes building the Spider-Man Headquarters an enjoyable experience for both children and parents.

2.3 Tips for Building the Spider-Man Headquarters

When building the Spider-Man Headquarters, start by sorting the bricks by color and shape to streamline the process. Use the visual instructions to guide you, as they provide clear step-by-step imagery. Encourage children to participate by assigning them simple tasks, like placing smaller bricks or attaching accessories. To ensure stability, build the base first and make sure all connections are secure. Test movable parts, such as the web-slinging mechanism, before allowing children to play. If a brick doesn’t fit easily, check the instructions to confirm its correct placement. For younger builders, consider pre-assembling complex sections. Finally, place the completed headquarters on a flat surface to prevent tipping. These tips will help create a fun and stress-free building experience for both kids and adults.

LEGO DUPLO Spider-Man & Hulk Adventures (Set 10876)

LEGO DUPLO Spider-Man & Hulk Adventures (Set 10876) is a fun, interactive set designed for young children. Featuring 38 large, easy-to-handle bricks, it encourages imaginative play and teamwork between Spider-Man and Hulk. Durable and safe, it introduces toddlers to superhero adventures with step-by-step instructions for simple assembly, making it perfect for little hands to explore and create.

3.1 Overview of Set 10876

LEGO DUPLO Spider-Man & Hulk Adventures (Set 10876) is a vibrant and engaging playset designed for young children aged 2-5 years. Released in 2018, this set includes 38 large, easy-to-handle DUPLO bricks, perfect for small hands to grasp and assemble. The set brings to life the adventures of Marvel’s Spider-Man and Hulk, encouraging imaginative play and teamwork. With its sturdy construction and oversized pieces, it promotes creativity and motor skill development. The set is ideal for introducing toddlers to the world of superheroes, allowing them to recreate exciting scenarios and stories. The instructions are simple and clear, making it easy for parents and children to build together. This set is a great way to foster a love for building and storytelling while enjoying the thrill of Marvel adventures.

3.2 Instructions for Building the Spider-Man & Hulk Adventures Set

The instructions for LEGO DUPLO Spider-Man & Hulk Adventures (Set 10876) are designed to be user-friendly and accessible for young builders. The 38-piece set comes with a clear, step-by-step guide that helps children and parents build the playset together. Each page of the booklet features large, colorful visuals, making it easy to follow along. The instructions emphasize the use of oversized DUPLO bricks, ensuring that even the smallest hands can handle the pieces. The guide also highlights key features, such as the buildable Hulk and Spider-Man figures, as well as interactive elements like movable parts. By following the instructions, kids can create a dynamic playset that encourages imaginative storytelling and superhero adventures. The instructions are straightforward, allowing children to develop their problem-solving skills while having fun.

3.3 Unique Elements in Set 10876

LEGO DUPLO Spider-Man & Hulk Adventures (Set 10876) features unique elements that make it stand out. The set includes buildable figures of Spider-Man and Hulk, designed with oversized DUPLO pieces for easy handling. A standout feature is the Hulk’s movable arms, allowing kids to recreate dynamic superhero poses. The set also includes a Spider-Man web shooter, adding an interactive play element. Additionally, the playset incorporates a bridge and a vehicle, enhancing storytelling possibilities. The large, colorful bricks are perfect for little hands, and the simple design ensures quick assembly. These elements combine to create a engaging and imaginative play experience, encouraging children to explore the world of Marvel superheroes while developing their motor skills and creativity.

LEGO DUPLO Spider-Man Spider Truck Adventure (Set 10608)

LEGO DUPLO Spider-Man Spider Truck Adventure (Set 10608) is a vibrant playset featuring a buildable Spider-Man truck. Designed for young children, it combines imaginative superhero play with easy-to-follow instructions for assembly. The set includes large, sturdy DUPLO bricks, perfect for small hands, and encourages creative storytelling and motor skill development. With its colorful design and simple construction, this set is ideal for introducing toddlers to the world of Spider-Man adventures while fostering their creativity and problem-solving abilities.

4.1 Features and Components of Set 10608

The LEGO DUPLO Spider-Man Spider Truck Adventure (Set 10608) includes a buildable Spider-Man truck, a Spider-Man figure, and a villain minifigure. The set features large, colorful DUPLO bricks designed for small hands, with easy-to-follow instructions. Components include a truck chassis, wheels, and accessories like a spider and a wrench. The set encourages imaginative play, allowing children to recreate Spider-Man adventures or invent their own stories. Durable and safe, it promotes creativity, fine motor skills, and problem-solving abilities. With 38 pieces, this set is ideal for toddlers aged 2-5 years, offering a fun introduction to the Spider-Man universe while fostering early construction skills. The simple design ensures quick assembly, making it perfect for young builders to enjoy independently or with parental guidance.

4.2 Detailed Instructions for the Spider Truck

The instructions for the LEGO DUPLO Spider-Man Spider Truck Adventure (Set 10608) are designed to be clear and easy to follow, with large, colorful visuals to guide young builders. Each step is broken down into simple actions, making it accessible for toddlers. The booklet begins with sorting the bricks by color and shape, then progresses to building the truck and its accessories. Icons and minimal text ensure that even non-readers can understand the process. The instructions also highlight key elements like the truck’s wheels and Spider-Man’s web, encouraging imaginative play. With a focus on durability, the set ensures that the truck is sturdy and fun to roll around. Parents and children can work together, fostering collaboration and creativity while bringing the Spider-Man adventure to life. The instructions are available online for easy reference, ensuring that the building experience is enjoyable and stress-free.

4.3 Creative Play Ideas with Set 10608

Set 10608, the Spider-Man Spider Truck Adventure, offers endless opportunities for imaginative play. Children can create their own superhero stories, with Spider-Man saving the day using the truck as his trusty vehicle. Encourage role-playing by incorporating other Marvel characters or creating villains for Spider-Man to battle. The truck’s wheels and movable parts inspire dynamic adventures, such as racing to rescue civilians or transporting Spider-Man to new locations. Parents can also engage by helping kids build obstacle courses using the truck and other DUPLO bricks, promoting problem-solving skills. Additionally, the set’s portability allows for play on-the-go, making it a great companion for travel or outdoor adventures. By combining creativity and storytelling, the Spider Truck set fosters active play and developmental growth in young builders;

LEGO DUPLO Spider-Man and Friends: Funfair Adventure (Set 10963)

Set 10963 brings Marvel’s Spider-Man to a vibrant funfair, complete with rides and attractions. Designed for young builders, it features colorful, oversized bricks and engaging play elements to inspire creativity and storytelling.

5.1 What’s Included in Set 10963

Set 10963, LEGO DUPLO Spider-Man and Friends: Funfair Adventure, includes 5;38MB of PDF instructions for assembly. This vibrant set features a variety of funfair elements, such as a Ferris wheel, carousel, and ticket booth, designed to spark imaginative play. It comes with a selection of large, easy-to-handle DUPLO bricks, perfect for small hands. The set also includes Spider-Man and his friends as minifigures, along with other funfair characters, adding to the storytelling experience. With its colorful and interactive design, this set encourages creativity and learning through play. The instructions guide parents and children through building the funfair, ensuring a smooth and enjoyable assembly process. Additionally, the set promotes motor skills and problem-solving abilities in young builders, making it both entertaining and educational. The Funfair Adventure set is a great way to introduce toddlers to the world of Marvel’s Spider-Man while fostering their creativity and imagination.

5.2 Instructions for Building the Funfair Adventure

The instructions for LEGO DUPLO Spider-Man and Friends: Funfair Adventure (Set 10963) are provided in a downloadable PDF format, ensuring easy access for parents and children. The guide is divided into clear, step-by-step sections, making it simple for young builders to follow along. Each page features large, colorful visuals that highlight individual brick placements, minimizing confusion. The instructions begin with assembling the base structure of the funfair, followed by adding key elements like the Ferris wheel and carousel. Additional sections focus on constructing smaller details, such as the ticket booth and game stalls. The instructions are designed to be kid-friendly, with minimal text and emphasis on visual cues. Parents are encouraged to assist younger children, while older kids can build independently. The guide also includes tips for organizing bricks and troubleshooting common building challenges, ensuring a smooth and enjoyable experience for all. By following these instructions, families can create a vibrant and interactive funfair adventure that sparks creativity and imaginative play.

5.3 Tips for Customizing the Funfair Adventure

Customizing the LEGO DUPLO Spider-Man and Friends: Funfair Adventure (Set 10963) is an excellent way to add a personal touch to your child’s playset. One tip is to incorporate additional DUPLO bricks from other sets to expand the funfair’s attractions, such as adding more rides or stalls. Another idea is to use different colored bricks to create unique patterns or themes, making the funfair stand out. Parents can also introduce movable parts, like turning wheels or swinging elements, to enhance interactivity. Encourage children to use their imagination by letting them design their own booths or games within the funfair. Additionally, combining this set with other Spider-Man DUPLO sets can create a larger, interconnected play area. Finally, consider organizing the bricks by color or shape before building to make the customization process smoother and more enjoyable for young builders.

Understanding LEGO DUPLO Instructions

LEGO DUPLO instructions provide clear, visual guides for assembling Spider-Man sets, using images and symbols to simplify the process. Designed for easy assembly, they cater to young builders, fostering creativity and skill development through step-by-step construction guides.

6.1 How to Read LEGO DUPLO Instruction Booklets

Reading LEGO DUPLO instruction booklets is straightforward, with visual guides that make assembly intuitive for young builders. Each booklet typically starts with a cover page showing the completed model, followed by a parts list to organize bricks beforehand. Instructions are presented in numbered steps, using large, clear images to demonstrate each action. Symbols and icons highlight specific tasks, such as turning pieces or connecting elements. For parents or caregivers, the booklets often include tips to help children stay on track. The instructions are designed to be simple, ensuring that even toddlers can follow along with minimal supervision. By breaking the build into manageable steps, LEGO DUPLO instructions foster independence and confidence in young builders while encouraging creative play.

6.2 Common Symbols and Icons in Instructions

LEGO DUPLO instruction booklets use a variety of symbols and icons to guide builders through the assembly process. Common symbols include a rotation arrow, indicating when a piece needs to be turned, and a magnifying glass, highlighting smaller details. A part highlighter shows which brick to use next, while a checkmark confirms correct placement. Some booklets feature arrows pointing to specific connection points or showing the direction of assembly. These visual cues are designed to be intuitive, helping young builders understand each step without relying solely on text. Additional icons may represent actions like pressing down firmly or aligning studs. By standardizing these symbols, LEGO ensures consistency across all sets, making the instructions easy to follow for children and adults alike. These visual aids are key to the accessibility and simplicity of DUPLO instructions.

6.3 Troubleshooting Common Building Issues

When building LEGO DUPLO Spider-Man sets, common issues like missing pieces, misalignment, or stuck bricks can arise. If a piece doesn’t fit, double-check the instructions or rotate the brick. For stuck parts, gently wiggle them side to side to avoid breaking. Missing pieces can often be found by reorganizing your bricks or reviewing earlier steps. If instructions are unclear, look for visual cues like arrows or highlighted sections. Ensure all connections are secure but not forced, as excessive pressure can damage the bricks. For toddlers, adult supervision can help prevent mistakes. If issues persist, consult online resources or LEGO support for assistance. Troubleshooting is made easier by the detailed, step-by-step nature of DUPLO instructions, ensuring a smooth and enjoyable building experience.

General Tips for Building LEGO DUPLO Spider-Man Sets

Organize bricks by color or shape to streamline assembly. Encourage children to participate, fostering creativity and fine motor skills. Store completed sets and instructions securely for future play.

7.1 Organizing Your Bricks Before Assembly

Organizing your LEGO DUPLO Spider-Man bricks before assembly is essential for a smooth and enjoyable building experience. Start by sorting the bricks by color, shape, or size to make them easier to find during construction. Use plastic bags or small containers to categorize smaller pieces, while larger bricks can be placed directly on a clean, flat surface. This method helps reduce clutter and prevents pieces from getting lost. For younger builders, consider using a LEGO DUPLO sorting tray to keep everything visible and accessible. Adults can also benefit from this approach, as it minimizes frustration and allows for focused creativity. Referencing the instructions periodically will help ensure all pieces are accounted for and properly organized. A well-organized workspace not only speeds up the assembly process but also enhances the overall fun of building these Spider-Man sets with your child.

7.2 Involving Children in the Building Process

Involving children in the building process of LEGO DUPLO Spider-Man sets is a great way to foster creativity and teamwork. Encourage kids to take the lead by letting them choose which pieces to use next, guided by the instructions. This helps build confidence and decision-making skills. Parents or caregivers can assist by reading the instructions aloud and demonstrating how to connect pieces securely. For younger children, start with simpler steps, such as matching colors or shapes, before progressing to more complex tasks. Praise their efforts to keep them motivated and excited. Collaborative building strengthens the bond between generations and introduces children to the joy of constructing their favorite Marvel characters. Make it a fun, interactive experience by discussing the storylines and adventures Spider-Man might have with the finished set.

7.3 Storing Completed Sets and Instructions

Proper storage of completed LEGO DUPLO Spider-Man sets and their instructions ensures longevity and organization. Use airtight containers or plastic bins to store the sets, keeping them clean and dust-free. For the instructions, keep them in a designated binder or folder, labeled clearly for easy access. Consider digitizing the instructions by scanning or photographing them, then storing the files on a computer or cloud service as a backup. For larger models, display them on shelves or in display cases to protect them from dust and damage. Avoid exposing the sets to direct sunlight, as it may cause fading. By maintaining an organized storage system, you can ensure that both the sets and their instructions remain in great condition for future use. This also makes it easier for children to find and rebuild their favorite Spider-Man creations whenever they want.

Categories
Instructions

instructions for woods timer

Learn to set up and use Woods timers with ease. This guide covers essential steps for programming, adjusting settings, and troubleshooting. Discover how to automate lights and appliances efficiently, saving energy and enhancing home security. Follow clear instructions for optimal performance and convenience.

1.1 Overview of Woods Timer Models

Woods timers offer a variety of models designed to meet different needs, from basic to advanced automation. The Woods 50015 model features a digital display and memory backup, ideal for programming schedules without worrying about power outages. The 50102 and 50103 models are mechanical timers with grounded outlets, suitable for heavy-duty use. For those needing dual outlets, the 50104 model includes a nightlight, providing convenience and visibility. The 50016 model stands out with its 7-day programming capability, allowing users to set different schedules for each day of the week. These models cater to both indoor and outdoor applications, ensuring flexibility for lighting, appliances, and irrigation systems. Whether you need a simple timer or an advanced programmable device, Woods offers a solution tailored to your requirements. Each model is designed with user-friendly interfaces and durable construction, ensuring reliability and ease of use. By choosing the right Woods timer model, you can efficiently manage your electrical devices and create a convenient, energy-saving schedule.

1.2 Benefits of Using a Woods Timer

Using a Woods timer offers numerous benefits, making it an essential tool for home automation. One of the primary advantages is energy savings, as it allows you to control when your lights and appliances turn on and off, reducing unnecessary power usage. This not only lowers your utility bills but also extends the lifespan of your devices. Additionally, Woods timers enhance home security by creating the illusion of occupancy, deterring potential intruders when you’re away. The programmable features provide convenience, enabling you to automate routines without manual intervention. Many models also include memory backup, ensuring your settings are retained during power outages. For outdoor use, Woods timers are durable and designed to withstand harsh weather conditions, making them ideal for landscaping and irrigation systems. With options like nightlights and dual outlets, these timers add practicality and versatility to your daily life. By investing in a Woods timer, you can enjoy a smarter, more efficient, and secure living environment tailored to your needs.

Key Components of a Woods Timer

A Woods timer includes a digital display for easy time and program viewing, buttons for navigation and programming, grounded outlets for safe device connections, memory features to retain settings, a nightlight for visibility, and programmable options for scheduling automation.

2.1 Digital Display and Buttons

The digital display on a Woods timer provides a clear and concise view of the current time, programmed schedules, and settings. It typically features a backlit LCD screen for easy visibility, even in low-light conditions. Below the display, you’ll find a set of buttons that allow you to navigate through menus, set the time, and program on/off cycles. These buttons are usually labeled with functions such as “CLOCK,” “TIMER,” “DAY,” “HOUR,” “MINUTE,” and “SET.” The “CLOCK” button is used to set the current time, while the “TIMER” button toggles between programming modes. The “DAY” button allows you to select specific days of the week for your schedule, and the “HOUR” and “MINUTE” buttons let you adjust the time in increments. The “SET” button confirms your selections and saves your settings. Some models may also include additional buttons for features like memory recall or mode selection. Understanding how to use these buttons is essential for properly configuring your timer and ensuring it operates according to your desired schedule. By familiarizing yourself with the layout and function of each button, you can efficiently program and manage your Woods timer. This user-friendly design makes it accessible for both first-time users and those with more experience. The combination of a clear display and intuitive buttons ensures that setting up and adjusting your timer is a straightforward process.

2.2 Grounded Outlets and Memory Features

Woods timers are equipped with grounded outlets, ensuring safe and reliable connections for your devices. These outlets are designed to protect against electrical surges and provide a secure power supply. Models like the Woods 50102 and 50104 feature one or two grounded outlets, allowing you to control multiple appliances with a single timer. The outlets are clearly marked and positioned for easy access, making it simple to plug in your devices.

One of the standout features of Woods timers is their memory retention capability. In the event of a power outage, the timer retains its programmed settings, eliminating the need to reprogram it. This memory feature is especially useful for users who have complex schedules or multiple devices connected to the timer. It ensures uninterrupted operation and maintains your desired settings without any hassle.

Additionally, some Woods timers include a battery backup system, further enhancing their reliability. This feature ensures that your programmed schedules remain intact even during prolonged power outages. The combination of grounded outlets and memory features makes Woods timers a practical and dependable solution for automating your home or outdoor devices. These features not only enhance convenience but also provide peace of mind, knowing your settings are safe and your devices are protected.

2.3 Nightlight and Dual Outlets

Many Woods timer models come equipped with a convenient nightlight feature, providing a soft, energy-efficient glow in low-light conditions. This built-in LED light is designed to illuminate the timer’s display and surrounding area, making it easier to read and program in the dark. The nightlight is particularly useful for timers installed in outdoor or hard-to-reach locations, where visibility might otherwise be an issue.

In addition to the nightlight, certain Woods timers feature dual outlets, allowing users to control two separate devices from a single timer. This dual-outlet functionality is ideal for homeowners who want to automate multiple appliances or lights simultaneously. For example, you can program one outlet for your porch lights and the other for your holiday decorations, ensuring both turn on and off at the same time.

The combination of a nightlight and dual outlets enhances both convenience and functionality. The nightlight ensures easy operation in the dark, while the dual outlets provide flexibility for managing multiple devices. These features make Woods timers a practical choice for both indoor and outdoor applications, offering a seamless and energy-efficient way to automate your home.

2.4 Programming Options

Woods timers offer a variety of programming options to suit different needs, making it easy to automate your appliances and lights. One of the key features is the ability to set a weekly schedule, allowing you to program specific on/off times for each day of the week. This is particularly useful for maintaining consistent lighting or appliance usage patterns, even when you’re away from home.

Additionally, many models allow you to set multiple on/off times within a single day. This means you can program your timer to turn devices on in the morning, off during the day, and back on in the evening, all with a few simple button presses. Some timers also include a 7-day programming option, giving you even more flexibility to customize settings for each day of the week.

For added convenience, some Woods timers come with memory features that retain your programmed settings even during power outages. This eliminates the need to reprogram the timer after a power interruption, saving you time and hassle. The programming options are designed to be user-friendly, with clear buttons and displays that guide you through the process step by step.

With these advanced programming features, Woods timers provide a reliable and efficient way to manage your home’s electrical devices, ensuring everything runs smoothly according to your schedule.

Setting the Current Time

Press and hold the CLOCK button, then adjust the HOUR and MINUTE buttons to set the current time. Use the buttons to advance the display until the correct time is shown; Ensure the AM/PM setting is accurate for proper timer functionality.

3.1 Step-by-Step Instructions

To set the current time on your Woods timer, begin by pressing and holding the CLOCK button. While holding it, use the HOUR and MINUTE buttons to adjust the time. The display will advance with each press, allowing you to set the exact hour and minute. Once the correct time is shown, release the CLOCK button to save your settings. Ensure the AM/PM indicator is correct for accurate timekeeping. If needed, toggle between 12-hour and 24-hour formats by pressing and holding the CLOCK button while simultaneously pressing the TIMER button. This ensures your timer operates according to your preferred time format. Properly setting the time is crucial for the timer to function correctly, especially if you plan to program specific on/off schedules for your devices. By following these steps, you can ensure your Woods timer is accurately set and ready for further programming.

3.2 Adjusting AM/PM Settings

Accurately setting the AM/PM on your Woods timer is essential for proper functionality. To adjust the AM/PM settings, press and hold the CLOCK button while simultaneously pressing the TIMER button. This action toggles between 12-hour and 24-hour time formats. In 12-hour mode, the timer displays time with an AM/PM indicator, whereas 24-hour mode shows time from 00:00 to 23:59 without AM/PM. Once the desired format is selected, release the buttons to save your preference. Ensure the AM/PM indicator aligns with your schedule to avoid timing errors. For models without a dedicated AM/PM button, this toggle method is the standard way to switch formats. If unsure, refer to your specific Woods timer manual for confirmation. Proper AM/PM settings ensure your timer operates correctly, especially when programming on/off schedules. Double-check the time display after adjusting to confirm accuracy. This step is crucial for maintaining consistent automation of your devices. By following these steps, you can easily manage the time format on your Woods timer and ensure seamless operation.

Programming the Timer

Press the PROG button to start programming. Use the DAY button to select specific days. Set the desired on and off times using the time-adjusting buttons. Save your settings to complete the programming process. This allows for custom schedules and efficient automation of devices.

4.1 Setting a Weekly Schedule

To set a weekly schedule on your Woods Timer, press the PROG button once. Use the DAY button to select the days of the week when you want the timer to activate. For example, press the button until all seven days are displayed or only the specific days you choose. Next, press the time-adjusting buttons to set the desired ON and OFF times. You can program multiple on/off cycles per day if needed. Once you’ve set your schedule, press the SAVE button to store your settings. The timer will now automatically follow your programmed schedule throughout the week.

For added convenience, some Woods Timer models allow you to set different schedules for each day of the week. This feature is ideal for users with varying routines. After programming, the timer will remember your settings even during power outages, thanks to its memory feature. Ensure the timer is properly grounded and plugged into a working outlet for reliable operation. By following these steps, you can create a customized weekly schedule tailored to your needs.

Categories
Instructions

juicy bar vape charging instructions

Welcome to the comprehensive guide on charging your Juicy Bar Vape. These devices come fully charged and ready to use, featuring a convenient USB-C port for easy recharging. Follow this guide to ensure optimal performance and longevity of your vape.

Overview of Juicy Bar Vape Devices

Juicy Bar Vape devices are popular disposable vapes designed for convenience and ease of use. They come fully charged and ready to vape, eliminating the need for complex setup. These devices feature a sleek, portable design with a built-in battery and USB-C charging port for effortless recharging. Juicy Bar Vapes are known for their simplicity, requiring no maintenance or coil replacements. They are draw-activated, meaning users simply inhale to start vaping. The devices are pre-filled with vape juice and offer a variety of flavors. While some models include features like LED lights or adjustable settings, most are designed for straightforward, hassle-free vaping experiences. Their compact size and user-friendly design make them a favorite among both beginners and experienced vapers.

Importance of Proper Charging Techniques

Proper charging techniques are essential for maintaining the performance and longevity of your Juicy Bar Vape. Improper charging can lead to reduced battery life, overheating, and even device malfunction. Using the correct USB-C cable and compatible charger ensures safe and efficient charging. Avoiding overcharging is crucial, as it can degrade the battery over time. Monitoring the charging process and adhering to manufacturer guidelines helps prevent potential hazards. Additionally, using high-quality charging accessories minimizes the risk of damage to the device. By following proper charging practices, you can enjoy consistent vaping performance and extend the life of your Juicy Bar Vape. Always prioritize safety and efficiency when charging your device to maximize its functionality and reliability.

Understanding Juicy Bar Vape Components

Juicy Bar Vapes consist of a rechargeable battery, a heating coil, a vape juice reservoir, and a mouthpiece. These components work together to deliver a smooth vaping experience.

Key Parts of the Juicy Bar Vape

The Juicy Bar Vape is designed with essential components to ensure seamless functionality. The internal battery powers the device, while the USB-C port allows for convenient charging. The vaporizer, or heating element, converts the e-liquid into vapor. The e-liquid reservoir holds the vape juice, and the mouthpiece provides a comfortable vaping experience. Some models also feature an LED light to indicate charging status and battery levels. These components work together to deliver a hassle-free and enjoyable vaping experience. Proper maintenance of these parts is crucial for optimal performance and longevity.

Identifying the Charging Port

The charging port on your Juicy Bar Vape is a USB-C port, typically located at the bottom of the device. This port is designed for easy access and safe charging. To identify it, look for a small, rectangular opening on the base of the vape. The USB-C port is compatible with standard USB-C charging cables, ensuring versatility. Some models may have a slightly recessed port for better durability. The port is a crucial component for maintaining your device’s battery life and ensuring proper functionality. Always use the provided or a compatible USB-C cable to avoid any potential damage. Locating and identifying the charging port is the first step in keeping your Juicy Bar Vape powered and ready for use.

Battery Life and Performance

The Juicy Bar Vape is designed to deliver consistent performance with its rechargeable battery. Battery life varies based on usage patterns, but it typically lasts throughout the day for average users. The device is optimized to provide smooth vaping sessions without significant drops in power. Proper charging habits, such as avoiding overcharging and using compatible chargers, help maintain battery health. The internal battery is built to support the device’s features, including LED indicators and flavor delivery systems. Regular use and correct charging practices ensure the battery performs at its best. Monitoring charging times and avoiding extreme temperatures can further enhance battery longevity. By following recommended guidelines, users can enjoy a reliable and satisfying vaping experience with their Juicy Bar Vape.

Step-by-Step Charging Guide

Locate the USB-C port at the bottom of your Juicy Bar Vape. Connect the provided cable to a compatible charger. Plug the cable into the port gently. Ensure the charger is USB-C compatible. Avoid using damaged cables or chargers. Monitor the device as it charges. The LED indicator will show charging progress. Once fully charged, disconnect to prevent overcharging. Always use original or certified accessories for optimal safety and performance. Follow these steps to charge your Juicy Bar Vape efficiently and maintain its battery health; Charging typically takes 30-60 minutes, depending on the charger’s output. Keep the device upright while charging. Let it charge completely before first use. Store the cable properly after use. Charging your Juicy Bar Vape is straightforward and quick, ensuring continuous enjoyment of your vaping experience. Always prioritize safety and proper charging techniques.

Locating the USB-C Port

The USB-C port on your Juicy Bar Vape is typically located at the bottom of the device. It is designed for easy access and features a reversible connector for convenience. To find the port, gently turn the vape upside down or examine the base. You may need to remove any protective covering or rubber plug that covers the port for aesthetic or dust-protection purposes. Once located, ensure the port is clean and free of debris, as dirt or moisture can interfere with charging. Use a soft cloth or brush to clean the area if necessary. The USB-C port is a standard feature on rechargeable Juicy Bar Vapes, allowing for quick and efficient charging. Always handle the port with care to avoid damage and ensure proper connectivity.

Connecting the Charging Cable

To connect the charging cable to your Juicy Bar Vape, align the USB-C connector with the port at the bottom of the device. Gently insert the cable until it clicks or fits securely. Ensure the cable is properly seated to avoid loose connections, which can disrupt charging. Use the provided USB-C cable or a high-quality equivalent to prevent damage to the port or battery. Avoid forcing the connector, as this could harm the device. Once connected, the vape will typically power on automatically, indicating the start of charging. If your device has a power button, you may not need to press it during charging. Always check the cable for signs of damage before use to ensure safe and efficient charging. Proper connection is key to maintaining your Juicy Bar Vape’s performance and longevity.

Using a Compatible Charger

Using a compatible charger is essential for safely and effectively charging your Juicy Bar Vape. Always use the USB-C charger provided with the device or a high-quality, USB-C certified alternative. Avoid using non-compatible chargers, as they may damage the battery or cause overcharging. Ensure the charger’s power output matches the device’s requirements, typically 5V or lower, to prevent overheating. If unsure, refer to the user manual or manufacturer’s guidelines. Properly connecting the charger ensures optimal charging performance and extends the device’s lifespan. Never use modified or tampered chargers, as they can pose serious safety risks. Always prioritize using original or certified accessories to maintain your Juicy Bar Vape’s functionality and safety.

Monitoring the Charging Process

Monitoring the charging process is crucial to ensure the health and safety of your Juicy Bar Vape. Once connected to a compatible charger, observe the battery indicator light, which typically changes color to signal charging status. A red light often indicates charging, while a green light signals a full charge. Avoid leaving the device unattended during charging to prevent overheating. Check the device periodically to ensure it is charging correctly and not showing signs of malfunction, such as unusual heat or flickering lights. If the device feels excessively hot, disconnect it immediately to avoid potential damage. Proper monitoring helps maintain the battery’s performance and extends its lifespan. Always follow the manufacturer’s guidelines for charging times and conditions to ensure safe and efficient charging.

Charging Indicators and Notifications

Juicy Bar Vape devices feature battery indicator lights that signal charging status and notifications. These indicators help users understand when the device is charging, fully charged, or experiencing issues.

Understanding Battery Indicator Lights

The Juicy Bar Vape features indicator lights that provide essential feedback during charging and usage. A red light typically indicates the device is charging, while a green light signals it is fully charged. Some models may also display a blinking light to indicate low battery or charging status. Advanced versions, like those with LCD screens, show precise battery levels and charging progress. These indicators help users monitor their device’s power status effectively. Always refer to the specific model’s guide, as some Juicy Bar Vapes may have additional modes or lights for features like pulse or power level adjustments. Understanding these indicators ensures optimal battery management and a seamless vaping experience. Proper monitoring can also help prevent overcharging and extend the device’s lifespan. Stay informed about your vape’s status with these intuitive visual cues.

Knowing When the Device is Fully Charged

Your Juicy Bar Vape is designed with clear indicators to signal when it’s fully charged. Typically, the battery indicator light will change from red to green, signifying the charging cycle is complete. Some models may display a solid light instead of blinking once fully charged. Charging usually takes 30 minutes to an hour, depending on the model and battery capacity. Once the light turns green, it’s best to unplug the device to prevent overcharging, which can reduce battery lifespan. Always ensure the device is unplugged immediately after reaching full charge for optimal performance and longevity. Refer to your specific model’s instructions for any additional indicators or guidelines, as some variations may have unique charging completion signals. Proper charging habits will help maintain your Juicy Bar Vape’s efficiency and reliability over time.

Interpreting Charging Status Notifications

Juicy Bar Vape devices provide clear charging status notifications to keep you informed. The battery indicator light typically blinks red when charging and turns solid green when fully charged. Some models may display additional colors or patterns, such as blue for intermediate charging stages. Understanding these indicators ensures you can monitor the charging process effectively. If the light flashes rapidly or changes color unexpectedly, it may indicate an issue with the charger or port. Always use the provided USB-C cable and a compatible charger to avoid conflicts. By paying attention to these notifications, you can maintain your device’s health and ensure a seamless vaping experience. Proper interpretation of these signals is key to prolonging battery life and overall device performance.

Maintaining Battery Health

Proper charging habits and storage are crucial for extending your Juicy Bar Vape’s battery life. Avoid extreme temperatures and overcharging to prevent degradation. Regular cleaning of the charging port also ensures optimal performance and longevity.

Best Practices for Prolonging Battery Life

To prolong your Juicy Bar Vape’s battery life, adopt these best practices. First, avoid overcharging by unplugging the device once it reaches 100% charge. Store your vape in a cool, dry place, away from direct sunlight or extreme temperatures. Clean the charging port regularly to ensure proper connectivity and prevent damage from debris. Additionally, use the original or a high-quality compatible charger to maintain safe charging conditions. Finally, avoid draining the battery completely to 0% on a regular basis, as this can strain the battery over time. By following these guidelines, you can enjoy a longer-lasting and more reliable vaping experience.

Avoiding Overcharging

Avoiding overcharging is crucial to maintaining your Juicy Bar Vape’s battery health. Overcharging can degrade the battery over time, reducing its capacity and lifespan; To prevent this, always unplug the device once it reaches 100% charge. Use a compatible charger that aligns with the device’s specifications to ensure safe and efficient charging. Consider using a timer or a smart charger with automatic shut-off to avoid accidental overcharging. Additionally, avoid leaving the vape connected to the charger overnight, as this can cause unnecessary strain on the battery. By being mindful of your charging habits, you can preserve the performance and longevity of your Juicy Bar Vape.

Storing the Device Properly

Proper storage of your Juicy Bar Vape is essential for maintaining its performance and longevity. Store the device in a cool, dry place, away from direct sunlight and extreme temperatures. Avoid leaving it in vehicles or areas prone to moisture. If storing for an extended period, ensure the battery is partially charged (around 40-80%) to prevent deep discharge. Keep the device upright to avoid leaking and clean the charging port regularly to prevent corrosion. Do not store the vape near flammable materials or in environments where it could be exposed to physical stress. By following these guidelines, you can preserve the integrity of your Juicy Bar Vape and ensure it remains functional for future use.

Troubleshooting Common Issues

If your Juicy Bar Vape won’t charge, check the USB-C port for debris and ensure the cable is securely connected. Clean the port gently with a soft brush and avoid overcharging to maintain battery health.

Why Your Juicy Bar Vape Won’t Charge

Several factors can prevent your Juicy Bar Vape from charging. Common issues include a blocked or damaged USB-C port, which can be caused by debris or corrosion. Using an incompatible charger or a faulty charging cable may also disrupt the charging process. Additionally, overcharging can sometimes lead to battery performance issues. Always ensure the device is charged on a stable, cool surface and avoid using chargers with high wattage, as this can damage the internal battery. Regularly cleaning the port with a soft brush and checking for loose connections can help resolve many charging problems. Addressing these issues promptly will help maintain your vape’s functionality and extend its lifespan.

Fixing a Faulty Charging Port

A faulty charging port can often be resolved with simple troubleshooting. Start by inspecting the port for debris or corrosion, which can block the connection. Use a soft brush or a cotton swab to gently clean out any dirt or residue. If the issue persists, ensure you’re using the correct USB-C cable and charger. Avoid forcing the cable into the port, as this can cause further damage. If the port is bent or physically damaged, it may require professional repair or replacement. In some cases, the problem might lie with the cable itself, so try using a different one. Regular maintenance and careful handling can prevent such issues and ensure reliable charging.

Resolving Battery Connectivity Problems

Battery connectivity issues can prevent your Juicy Bar Vape from charging properly. Start by ensuring the charging port and cable are clean and free from debris. Use a soft brush or cotton swab to remove any dirt or residue that might block the connection. Next, check that the USB-C cable is properly aligned and fully inserted into the port. If the problem persists, try using a different compatible cable or charger to rule out any issues with the accessories. Avoid using damaged cables, as they can cause intermittent connections. If the device still doesn’t recognize the battery, gently reset it by disconnecting and reconnecting the cable. Regular cleaning and careful handling can help maintain a stable connection and ensure reliable charging performance over time.

Safety Precautions and Guidelines

Always use authentic chargers and cables to avoid damage. Avoid overcharging, as it can degrade the battery. Keep the device away from flammable materials while charging.

Essential Safety Tips for Charging

Always use the original charger and cable provided with your Juicy Bar Vape to ensure compatibility and safety. Avoid charging near flammable materials or water. Never leave the device unattended while charging, as overheating can occur. Use a heat-resistant surface for charging to prevent damage. Do not overcharge, as this can degrade the battery and reduce its lifespan. Keep the device away from direct sunlight or extreme temperatures. Avoid using damaged cables or chargers, as they can cause electrical hazards. Store the vape and charger in a cool, dry place when not in use. Follow these guidelines to ensure safe and efficient charging of your Juicy Bar Vape.

Avoiding Dangerous Charging Methods

Never use unapproved or damaged charging cables, as they can cause electrical issues or fires. Avoid charging your Juicy Bar Vape near open flames or sparks. Do not charge in humid environments or areas exposed to water, as this increases the risk of short circuits. Refrain from overcharging, as it can lead to battery degradation and potential overheating. Do not modify the charging port or battery, as this can result in serious safety hazards. Ensure the device is placed on a stable, heat-resistant surface while charging. Using incompatible chargers with higher voltage can cause irreversible damage. Always follow the manufacturer’s guidelines to prevent dangerous charging methods and ensure safe usage of your Juicy Bar Vape.

Preventing Overheating During Charging

To prevent overheating while charging your Juicy Bar Vape, always use the original or a compatible USB-C charger. Avoid using damaged or frayed cables, as they can cause electrical issues. Ensure the device is placed on a cool, dry surface away from direct sunlight or heat sources. Do not cover the vape while charging, as this can trap heat. Monitor the device during charging and disconnect it once fully charged, as overcharging can lead to overheating. Avoid charging in humid environments or areas exposed to moisture. By following these steps, you can help prevent overheating and ensure safe, reliable charging for your Juicy Bar Vape.

Additional Tips and Tricks

For optimal performance, clean the USB-C port regularly and use original accessories. Store your Juicy Bar Vape in a cool, dry place to maintain battery health and ensure longevity. Avoid extreme temperatures and moisture exposure to prevent damage. Regularly update firmware if available and monitor battery levels to avoid overcharging. Clean the device’s connections with a soft cloth to maintain proper charging efficiency. Following these tips can enhance your vaping experience and extend the life of your Juicy Bar Vape.

Optimizing Vape Performance

To optimize your Juicy Bar Vape’s performance, ensure the device is fully charged before use. Proper charging maintains consistent power delivery, preventing issues like weak vapor production. Regularly clean the USB-C port and connections with a soft cloth to remove debris that might interfere with charging efficiency. Store the device in a cool, dry place to protect the battery from heat damage. Avoid using damaged cables or chargers, as they can cause uneven power supply. By following these practices, you can enjoy a smooth and reliable vaping experience with your Juicy Bar Vape, ensuring it performs at its best every time you use it.

Cleaning the Charging Port

Cleaning the charging port of your Juicy Bar Vape is essential for maintaining proper connectivity and ensuring efficient charging. Use a soft, dry cloth or a cotton swab to gently remove any debris, dust, or residue that may accumulate in the USB-C port. Avoid using liquids or harsh chemicals, as they can damage the internal components. Regular cleaning helps prevent charging issues and ensures a stable power supply. For stubborn debris, lightly press the cotton swab into the port and twist it carefully. A clean charging port not only improves charging performance but also extends the lifespan of your device. By keeping the port free from obstructions, you can enjoy uninterrupted vaping and reliable battery function.

Using the Correct Charging Accessories

Using the correct charging accessories is crucial for maintaining your Juicy Bar Vape’s performance and safety. Always use the USB-C cable provided with your device or a high-quality, compatible alternative to avoid damaging the charging port or battery. Ensure the charger is designed for your vape’s specific voltage and wattage requirements. Avoid using high-wattage chargers, as they may cause overheating or reduce the battery’s lifespan. For optimal results, charge your Juicy Bar Vape using a standard USB port or a wall adapter rated for the device’s specifications. Never use modified or damaged cables, as they can pose a risk of electrical malfunction. By sticking to compatible and reliable charging accessories, you can ensure safe, efficient charging and prolong the life of your vape.

Adhering to proper charging guidelines ensures optimal performance and safety for your Juicy Bar Vape. Regular maintenance and responsible usage prolong battery life and enhance vaping satisfaction.

To ensure optimal performance and longevity of your Juicy Bar Vape, follow these best practices: Always use the provided USB-C cable and a compatible charger to avoid damage. Avoid overcharging, as it can degrade the battery over time. Monitor the charging process and disconnect once the device is fully charged. Store the vape in a cool, dry place when not in use to preserve battery health. Regularly clean the charging port to prevent dust buildup and ensure proper connectivity. By adhering to these guidelines, you can enjoy a seamless vaping experience while maintaining the device’s efficiency and safety. Proper charging habits not only extend the life of your Juicy Bar Vape but also enhance overall user satisfaction.

Encouraging Responsible Vaping

Responsible vaping practices are essential for ensuring safety and enjoyment. Always follow the manufacturer’s guidelines for charging and usage to avoid potential risks. Keep your Juicy Bar Vape out of reach of children and pets to prevent accidental misuse. Avoid overcharging, as it can degrade the battery and reduce performance. Store the device in a cool, dry place to maintain its longevity. Dispose of the device responsibly once it reaches the end of its life cycle. By adhering to these practices, you contribute to a safer and more respectful vaping community. Remember, vaping products are intended for adults and should be used responsibly to ensure a positive experience for everyone. Stay informed about proper vaping etiquette and safety measures to enhance your overall vaping journey.

Staying Informed About Vape Technology

Staying informed about the latest advancements in vape technology is crucial for optimizing your Juicy Bar Vape experience. As technology evolves, new features and improvements are continually being introduced, such as enhanced battery life, faster charging capabilities, and smarter safety features. By keeping up with these developments, you can ensure your device operates at its best and remains safe to use. Additionally, advancements in vape technology often focus on environmental sustainability, such as more efficient energy use and eco-friendly disposal methods. Regularly checking for updates and educational resources can help you make informed decisions about your vaping habits and device maintenance. This proactive approach not only enhances your vaping experience but also supports responsible and sustainable practices in the vaping community.

Categories
Instructions

spanking instructions

Understanding the Basics of Spanking

Spanking involves physical impact on the buttocks for discipline or pleasure․ It requires consent, clear communication, and safety measures to ensure a comfortable experience for both partners․

What is Spanking and Its Purpose

Spanking is a consensual act involving physical impact on the buttocks, typically for discipline, pleasure, or erotic play․ Its purpose varies, ranging from establishing boundaries to exploring intimacy․ Communication and consent are essential to ensure comfort and safety for both parties․ Safe words and clear agreements are often used to guide the experience․ Spanking can be a form of connection, play, or personal growth, depending on the context and intentions of those involved․

Key Safety Considerations

Ensure safety by avoiding joints, bony areas, and sensitive regions․ Use a safe word to halt activities if needed․ Start with gentle strokes and gradually increase intensity․ Prioritize open communication to monitor comfort levels․ Avoid using objects that may cause injury․ Keep hands loose and flexible to maintain control․ Respect physical limits and never proceed without consent․ Aftercare is essential to address emotional and physical needs post-session․ These precautions ensure a safe and consensual experience for all parties involved;

Choosing a Safe Word

Selecting a safe word is crucial for clear communication during spanking․ It should be easy to remember and unrelated to the activity․ Agree on a word or signal beforehand with your partner․ This ensures both parties can pause or stop the session comfortably․ Examples include colors like “red” for stop or “yellow” for slow down․ Consistently honor the safe word to build trust and ensure a consensual experience․ This practice prioritizes safety and mutual respect, enhancing the overall interaction․

Preparing for a Spanking Session

Discuss boundaries, preferences, and limits with your partner․ Create a comfortable environment, ensuring privacy and relaxation․ Use protective gear if needed to enhance safety and comfort․

Discussing Boundaries and Preferences

Open dialogue is crucial before any spanking session․ Both partners should share their desires, limits, and concerns․ Agree on intensity levels, safe words, and acceptable tools or implements․ Discussing boundaries ensures mutual consent and understanding, fostering trust and comfort․ Establishing clear preferences helps tailor the experience to suit both individuals, making it enjoyable and safe․ Communication also allows for adjustments during the session, ensuring both parties remain comfortable and satisfied with the activity․

Creating a Comfortable Environment

A comfortable setting is essential for a positive spanking experience․ Ensure privacy to avoid interruptions and create a relaxing atmosphere․ Use pillows or padding to support the body, reducing discomfort․ Maintain open communication to address any concerns or needs․ A calm and trusting environment fosters mutual ease, allowing both partners to focus on the activity․ Attention to detail, such as lighting or music, can enhance the experience, making it more enjoyable and stress-free for everyone involved․

Using Protective Gear and Tools

Using protective gear and tools ensures safety and comfort during spanking․ Opt for soft implements like paddles or belts, avoiding hard or rigid objects․ Hands are ideal for control and sensitivity․ Always prioritize areas with padding, such as the buttocks, and avoid joints or bony regions․ Protective gear, like cushions, can reduce discomfort․ Start gently to gauge tolerance and adjust intensity based on feedback․ Proper tool selection and technique minimize risks, ensuring a safe and enjoyable experience for both participants․

Techniques for Safe Spanking

Start with gentle strokes, using hands or soft tools․ Maintain control, aim for padded areas, and avoid joints․ Adjust intensity based on feedback to ensure comfort and safety․

Starting with Gentle Strokes

Begin with light, soft taps to ease into the session․ This approach helps the recipient adjust to the sensation and builds anticipation․ Gentle strokes also allow both partners to assess comfort levels and communication․ It’s crucial to avoid harsh impacts initially, ensuring a safe and enjoyable experience․ Gradually increasing intensity, if desired, should always be guided by clear feedback and mutual consent․ This method fosters trust and sets a positive tone for the entire session․

Using Hands vs․ Implements

When deciding between hands and implements, consider personal preference and intensity․ Hands offer a more intimate and controlled experience, allowing for gentle strokes or firmer smacks․ Implements, like paddles or belts, can enhance sensations and vary impact․ Safety is paramount; avoid using objects with sharp edges or heavy materials․ Always prioritize comfort and consent, ensuring the chosen method aligns with both partners’ boundaries․ Communication is key to adapting techniques and maintaining a pleasurable experience for everyone involved․

How to Maintain a Safe Distance

Maintaining a safe distance during spanking ensures comfort and control․ Stand close enough to deliver firm, consistent strikes without straining․ Avoid being too far, as this may lead to wild swings․ Keep your arm slightly bent, allowing for precise movement․ Pay attention to your partner’s reactions and adjust your stance if needed․ A safe distance fosters trust and intimacy, ensuring both physical and emotional well-being․ Always prioritize communication to gauge comfort levels and make necessary adjustments for a mutually enjoyable experience․

Communication During the Session

Clear communication is essential․ Use verbal cues like “more” or “slow” to guide intensity․ Check in regularly to ensure comfort and consent, adjusting as needed․

Verbal Cues and Feedback

Verbal cues are crucial for maintaining clear communication during a spanking session․ Use simple phrases like “harder,” “softer,” or “stop” to guide intensity; A safe word should always be in place to halt the session immediately if needed․ Both partners should feel comfortable providing feedback, ensuring the experience remains enjoyable and consensual․ Non-verbal signals, like hand gestures, can also be used if verbal cues are challenging․ Regular check-ins help ensure both parties are satisfied and safe throughout the process․

Monitoring Pain Levels

Monitoring pain levels is essential to ensure a safe and consensual experience․ Check in with your partner regularly to assess their comfort and tolerance․ Use verbal cues or a safe word to pause or adjust intensity․ Pay attention to physical reactions, such as flinching or tensing, which may indicate discomfort․ Adjust your technique or pause if pain becomes overwhelming․ Open communication ensures both partners remain within agreed boundaries, making the session enjoyable and safe for everyone involved․

Adjusting Intensity Based on Response

Adjusting intensity during spanking ensures the experience remains enjoyable and safe․ Start with gentle strokes and gradually increase firmness based on your partner’s feedback․ Pay attention to verbal cues, such as a safe word, or non-verbal signals like tensing up․ If your partner indicates discomfort, pause or reduce intensity immediately․ Gauge their reaction to determine the right balance between pleasure and pain․ Continuous communication ensures the session aligns with their comfort level and desires, fostering trust and mutual satisfaction․

Aftercare and Follow-Up

Aftercare involves physical comfort and emotional reassurance post-session․ Check in on each other’s well-being, address any discomfort, and ensure both parties feel cared for and valued․

Physical Aftercare

Physical aftercare ensures comfort and care post-session․ Check for any marks or discomfort, and apply ice or lotion if needed․ Offer reassurance through gentle touch or cuddling․ Ensure both partners are hydrated and relaxed․ Attend to any physical needs, like stretching or hygiene․ This step helps transition back to a calm state, reinforcing trust and connection․ Prioritize open communication to address any sensations or concerns, fostering a safe and nurturing environment for both individuals involved․

Emotional Support and Reassurance

Emotional support and reassurance are crucial after a spanking session․ Check in with your partner to ensure they feel safe and valued․ Offer kind words to reaffirm their comfort and your care․ Listen actively to their feelings and validate their experience․ Provide physical comfort, like holding or cuddling, to reinforce trust․ This step helps both partners process emotions and strengthens the bond between them․ Open communication ensures clarity and mutual understanding, fostering a positive and supportive environment for all involved․

Debriefing the Experience

Debriefing after a spanking session is essential for both partners to reflect on the experience․ Discuss what worked well and what could be improved, using specific examples․ Listen actively to each other’s feelings and perspectives․ This open dialogue helps clarify expectations and strengthens trust․ It also provides an opportunity to address any concerns or discomfort․ Debriefing ensures both parties feel heard and understood, fostering a positive and growth-oriented experience․ This step is crucial for maintaining healthy communication and ensuring future sessions are enjoyable and consensual for all involved․

Advanced Tips and Variations

Explore incorporating role-play, combining spanking with other forms of play, and experimenting with different tools and techniques to enhance the experience safely and consensually․

Incorporating Role-Play

Role-play adds excitement and creativity to spanking sessions․ Discuss boundaries and preferences beforehand to ensure comfort․ Use scenarios like teacher-student or naughty-nice dynamics․ Safe words are essential for clear communication․ Start gently, gradually increasing intensity based on feedback․ Incorporate props like costumes or paddles to enhance the experience․ Ensure mutual consent and respect throughout․ This approach allows both partners to explore new dynamics while maintaining safety and enjoyment․

Combining Spanking with Other Forms of Play

Combining spanking with other forms of play, such as bondage or sensory play, can enhance the experience․ Start with gentle strokes and gradually incorporate tools like paddles or floggers․ Communication is key—use safe words and check-ins to ensure comfort․ Discuss boundaries beforehand to align preferences․ This fusion allows exploration of diverse sensations while maintaining safety and consent․ Adjust intensity based on feedback to create a balanced and enjoyable session for both partners․

Exploring Different Tools and Techniques

Exploring tools like paddles, belts, or floggers can add variety to spanking․ Start with softer implements and gradually intensity․ Hands remain a popular choice for control․ Techniques vary from gentle taps to firm strokes․ Ensure tools are safe, avoiding joints or bony areas․ Communication is vital—agree on preferences and limits beforehand․ Safe words help regulate intensity․ Experimenting with rhythm and pressure enhances sensations․ Always prioritize comfort and consent, adjusting techniques based on feedback to ensure a pleasurable experience for both partners․

Common Mistakes to Avoid

Ignoring safe words, exceeding physical limits, and neglecting aftercare are common mistakes․ Ensure clear communication, respect boundaries, and prioritize consent to avoid discomfort or harm․

Overlooking Safe Words

Ignoring safe words is a common mistake that can lead to discomfort or harm․ Safe words are essential for clear communication, allowing participants to signal when to stop or pause․ Overlooking them can result in physical or emotional distress․ Always agree on a safe word beforehand and respect it without hesitation․ This ensures trust and mutual respect, making the experience enjoyable and consensual for everyone involved․

Ignoring Physical Limits

Ignoring physical limits can lead to injury or discomfort․ It’s crucial to respect boundaries and avoid striking sensitive or bony areas, such as the spine, hips, or joints․ Always prioritize safety by using light to moderate force and avoiding excessive intensity․ Physical limits vary per individual, so open communication is key to ensuring a consensual and enjoyable experience․ Disregarding these limits can result in pain, bruising, or long-term harm, undermining trust and safety in the relationship․

Not Prioritizing Aftercare

Neglecting aftercare can lead to emotional or physical distress․ Aftercare is essential for reassurance and comfort, helping both partners transition smoothly from the session․ Ignoring this step may result in unresolved tension or discomfort․ Physical aftercare, such as gentle touch or soothing words, ensures the well-being of the person who was spanked; Emotional support is equally vital to reinforce trust and connection․ Failing to prioritize aftercare can leave one or both partners feeling unsettled, potentially harming the relationship and future interactions․

Cultural and Legal Perspectives

Cultural attitudes toward spanking vary widely, with some societies embracing it as a disciplinary tool and others condemning it․ Legally, many jurisdictions restrict or regulate its use․

Cultural Views on Spanking

Cultural attitudes toward spanking vary significantly across societies․ Some cultures view it as a traditional disciplinary method, while others condemn it as harmful or inappropriate․ In certain regions, spanking is seen as a normal part of parenting, while in others, it is increasingly criticized due to concerns about physical and emotional impact․ These differences often influence legal frameworks and societal norms surrounding its practice․ Open discussions about consent, boundaries, and alternatives continue to shape modern perspectives on spanking globally․

Legal Considerations

Legal perspectives on spanking vary widely depending on the region and context․ In some areas, consensual spanking between adults is legally acceptable, while in others, it may be subject to stricter regulations․ Non-consensual acts or excessive force can lead to legal consequences, including charges of assault․ It is crucial to understand local laws and ensure all activities are consensual and within agreed boundaries․ Legal frameworks often emphasize the importance of mutual agreement and the avoidance of harm, making it essential to respect these guidelines to avoid potential legal repercussions․

Social Stigma and Privacy

Social stigma often surrounds spanking due to misunderstandings and cultural differences․ Many view it as taboo or inappropriate, leading to judgment or privacy concerns․ To maintain privacy, discussions about spanking should occur in trusted settings, and activities should be kept confidential to avoid unwanted attention․ Open communication with partners about boundaries and preferences helps navigate societal expectations while ensuring mutual respect․ Privacy is key to fostering a safe and consensual environment for all parties involved, allowing individuals to explore their interests without fear of judgment or exposure․

Resources and Communities

Explore books, online forums, and professional guidance for insights into spanking practices․ Communities offer support and advice, ensuring safe and consensual experiences for all participants involved․

Recommended Reading

For deeper insights, explore books like “The Art of Spanking” and “Safe Spanking Guide”․ These resources cover techniques, safety tips, and communication strategies․ Online forums and blogs offer practical advice, while professional guides emphasize consent and boundaries․ Reading these materials helps ensure a safe and enjoyable experience for all parties involved, providing a solid foundation for understanding spanking dynamics and best practices․

Online Forums and Support Groups

Online forums and support groups offer valuable insights and advice on spanking practices․ Communities like FetLife and BDSM-focused Reddit groups provide platforms for sharing experiences and asking questions․ Many participants discuss techniques, safety tips, and personal preferences․ These spaces also offer emotional support and reassurance, helping individuals navigate their interests confidently; Engaging with these communities can enhance understanding and provide practical guidance for both beginners and experienced practitioners, fostering a sense of connection and shared learning․

Professional Guidance

Consulting with professionals, such as BDSM educators or therapists, can provide personalized guidance on spanking practices․ They offer expert advice on safety, consent, and communication, ensuring a positive experience․ Professionals can also address specific concerns or questions, helping individuals tailor their approach to their needs․ This resource is particularly valuable for those exploring spanking for the first time or seeking to deepen their understanding of the practice․ Professional guidance fosters confidence and ensures that all parties involved feel comfortable and informed․